Maximal Ease of Use I:
Fountain Pen Inks
(2011.0301)
If you don’t care to go through the hassle of dealing with highlighter markers (which I discuss below), there are some commercial fountain pen inks that will lase. These inks generally dilute nicely into either isopropyl alcohol or 190-proof ethanol (the brand that’s available in my area is Everclear), and a few even lase in water. They are easier to work with than anything else I have found to date, except possibly the “Optic Whitener” that I mention later in this section.
[Please note that opaque and/or nonfluorescent
highlighter inks are not suitable for this
application. Although it should be possible to
filter out particulate matter from opaque inks, doing so
may decrease or even eliminate the fluorescence.
Nonfluorescent inks are, of course, useless here.]
Side note: Water: As the concentration of a dye in a solvent increases, the amount of fluorescence eventually begins to decrease. This effect occurs in all or nearly all solvents, but seems to be particularly prominent in water, for those dyes that are soluble in it. As the effect, which iscalled concentration quenching, becomes more pronounced, it eventually prevents lasing. [For a good example, look at the photos of Baystate Cranberry ink in the bottle, and then in the cuvette after I have diluted it. Notice, also, the difference in appearance between dilutions in water and in alcohols.]
It is usually possible to ameliorate concentration quenching by adding a small amount of a detergent/surfactant to the water, but you have to use one that is compatible with the specific dye and does not absorb much of the pump or dye laser light. Fortunately, quite a few detergents are suitable. I have even used transparent dish liquid, though there is a caveat: most dish liquid seems to have some fluorescent material in it (probably a very small amount of an optical brightener), which could interfere with certain dyes. [Note, added 2018.0910: I have recently taken to checking dish liquid with a 405nm (violet) laser pointer. This isn’t infallible, as the absorption could be very different at 337 nm, and also because some dyes are incompatible with some types of detergent, but it usually seems to help.]
I do not know whether detergents can be used with solvents that don’t contain substantial amounts of water, but that’s because they don’t often seem to be necessary, so I’ve never tried, and I haven’t seen reports of other people trying. (This falls under the general heading of “If it ain’t broke, don’t fix it” or, as Ted Woodford says, “If it ain’t broke, don’t break it.”) Again, compare the fluorescence of Baystate Cranberry in water with the fluorescence in ethanol or isopropanol, and note the results I obtain when I pump them with the nitrogen laser.
Special Note, added 2013.1028: Holger Jaenisch
(who can be reached by sending email to lsei1 at yahoo
dot [the usual 3 letters]) reports that he has lased
several of the inks listed below (including M205 and
Noodler’s Blue Ghost) without bothering to
dilute them. I never even thought to try that! [As of
2018.0910, I have lased M205 undiluted.]
As of March 10th, 2011, I have lased five inks. [As
of late 2022, the number is a little higher.]
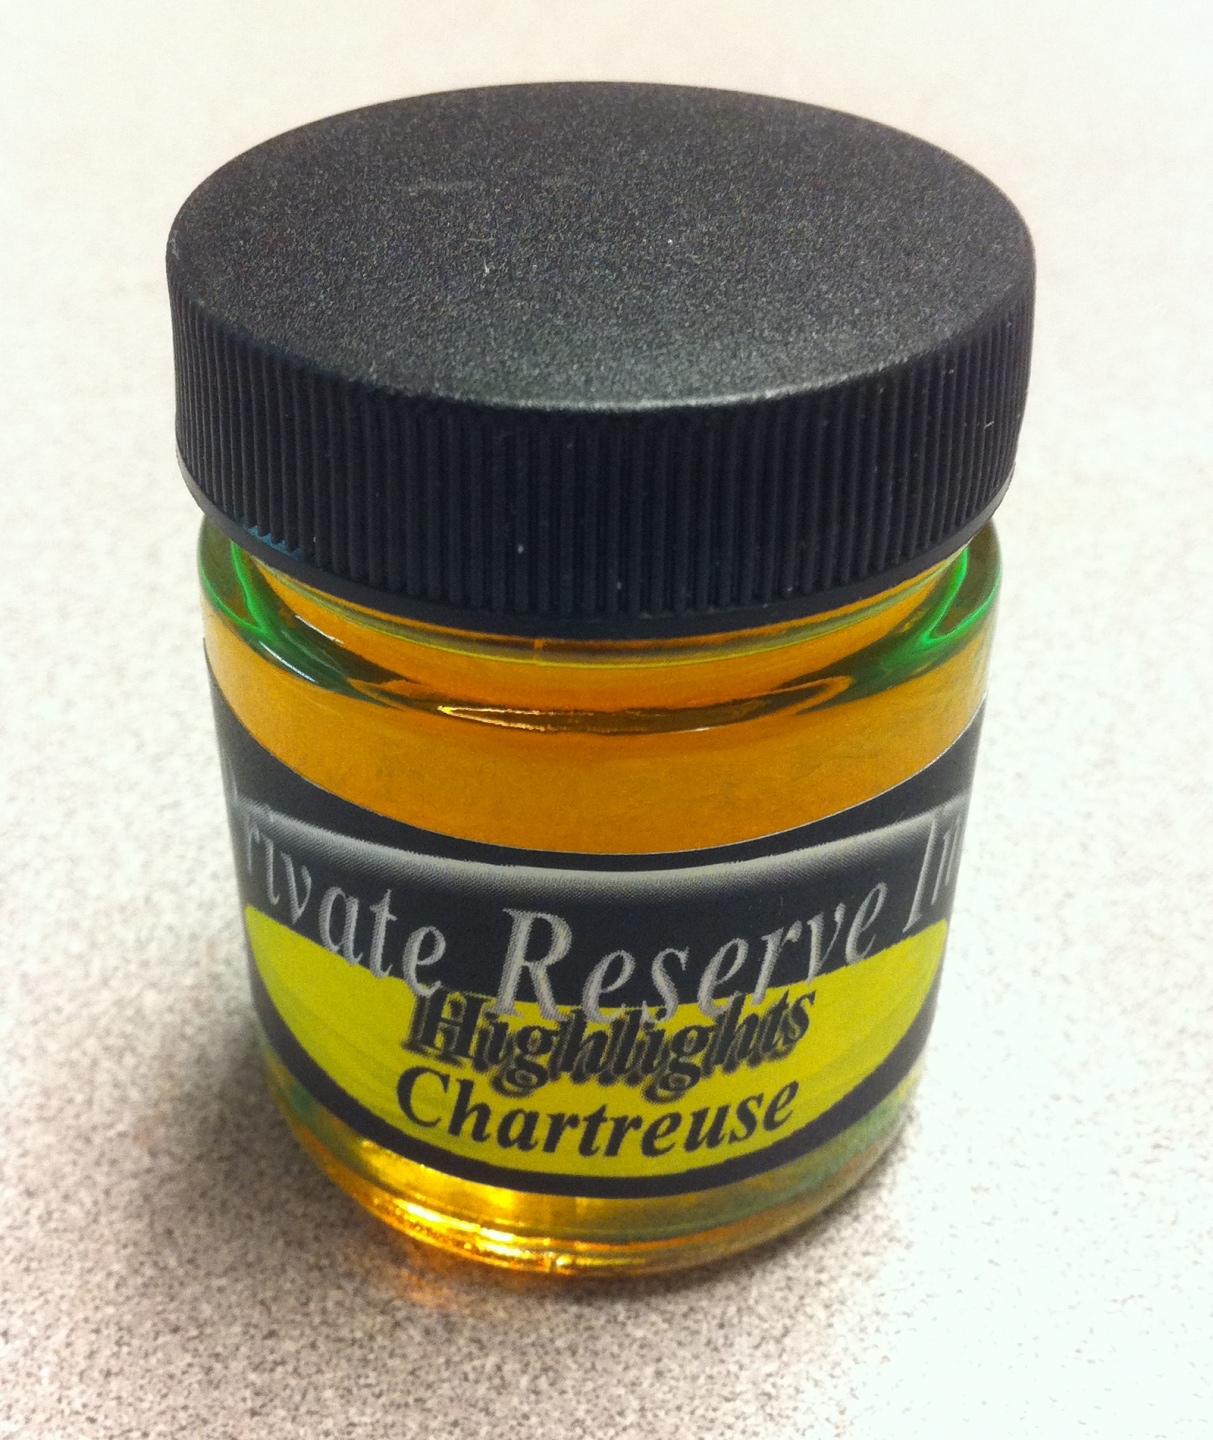
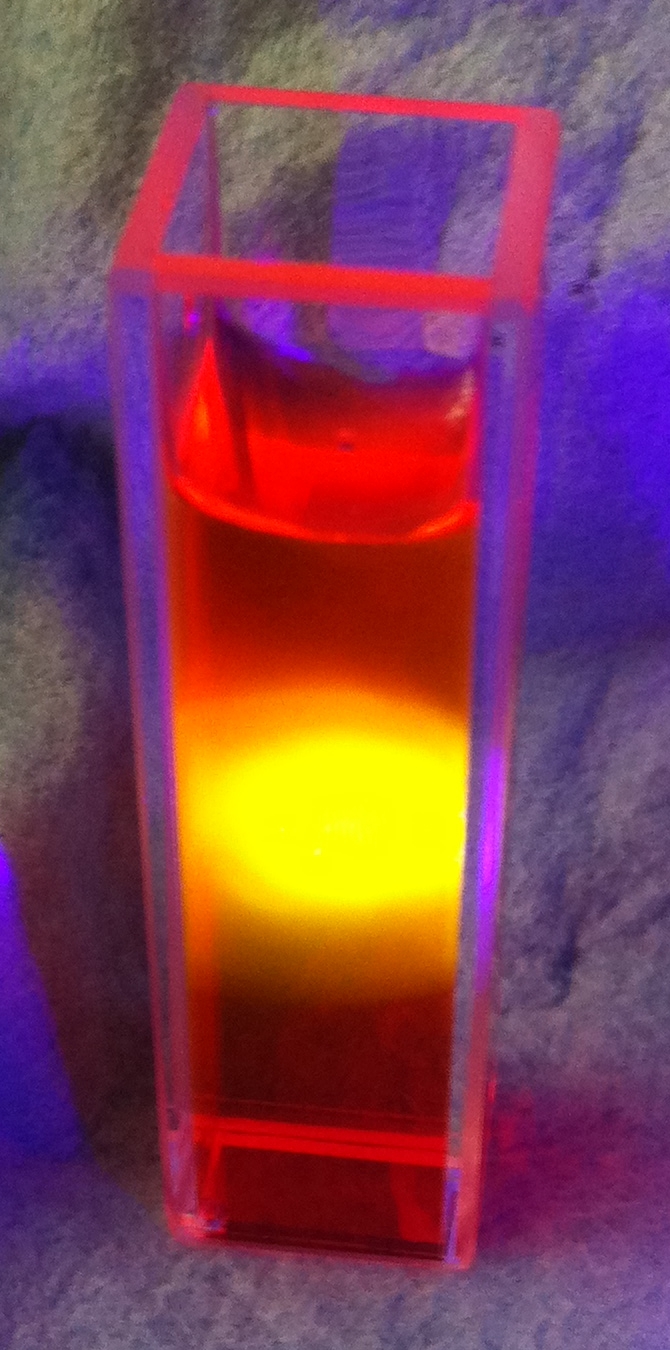
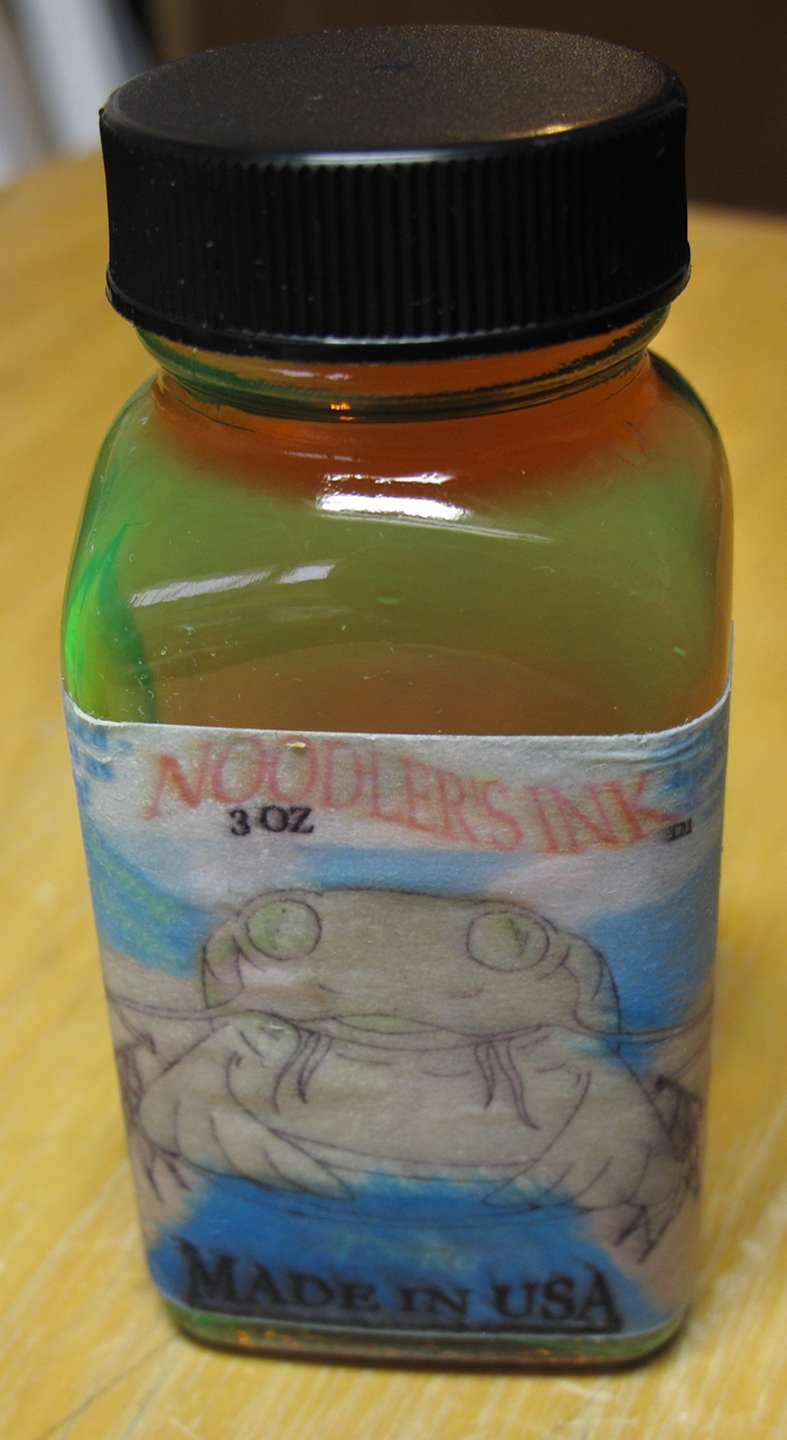
Here is a set of photos of the first one I tried,
Private Reserve Highlights ink, in
Chartreuse (I suspect that this is their only
transparent fluorescent highlighting ink), which I
bought at
Bertram’s Inkwell.
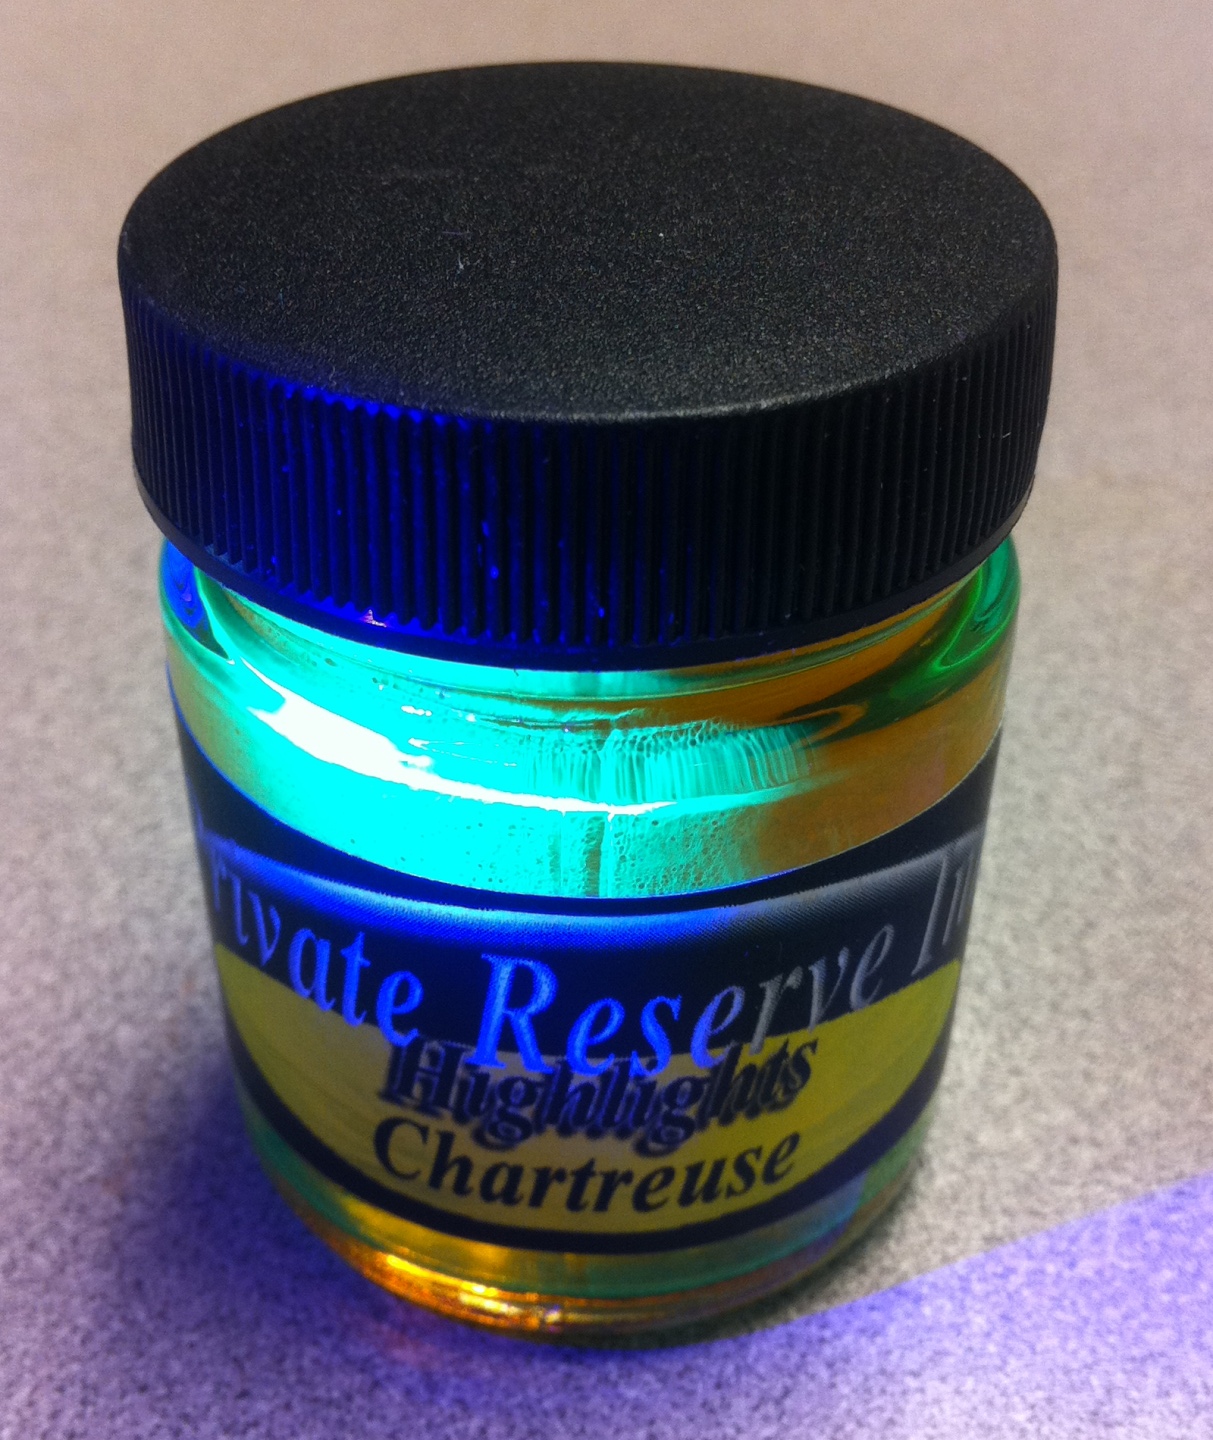
The first shows the bottle; as you would expect, you can
see some fluorescence just from the roomlight. The
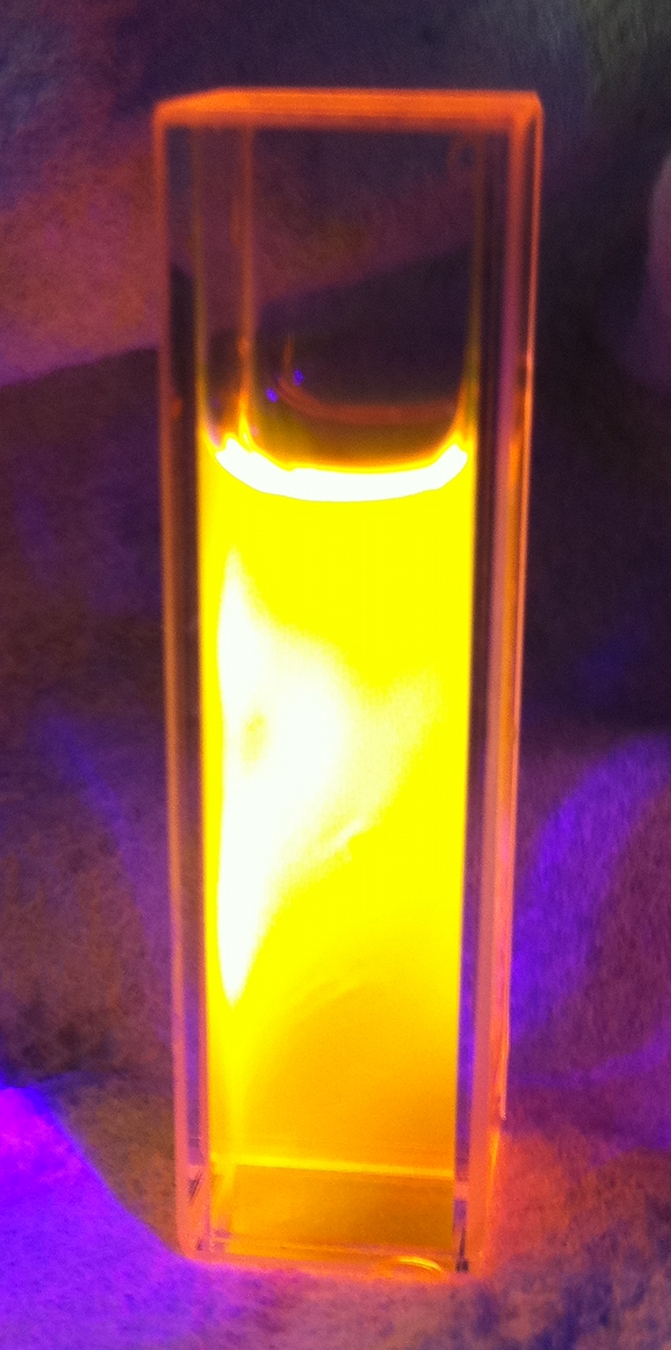
second shows the fluorescence with a longwave UV LED
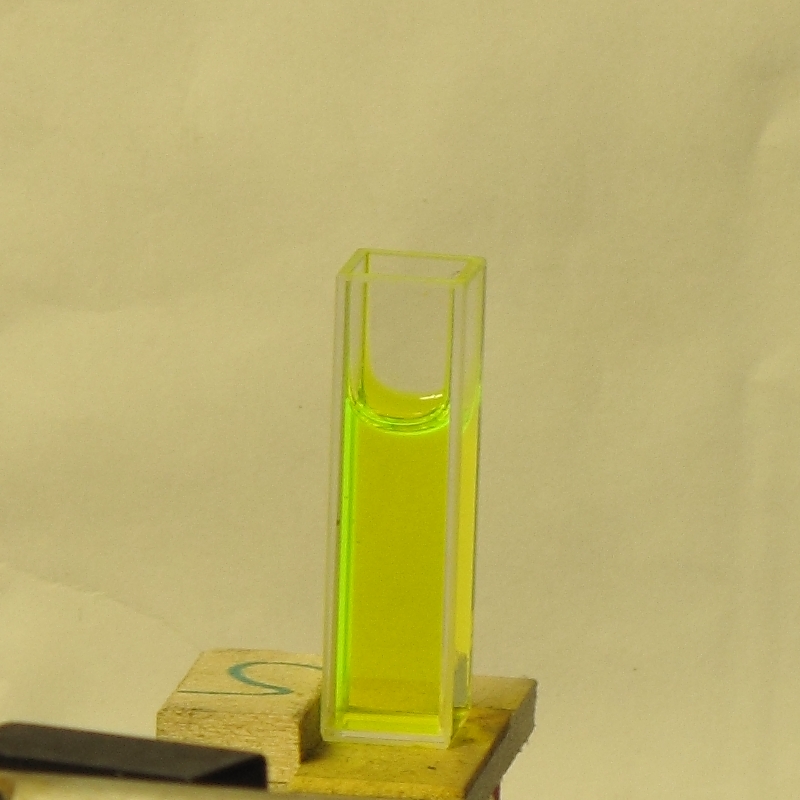
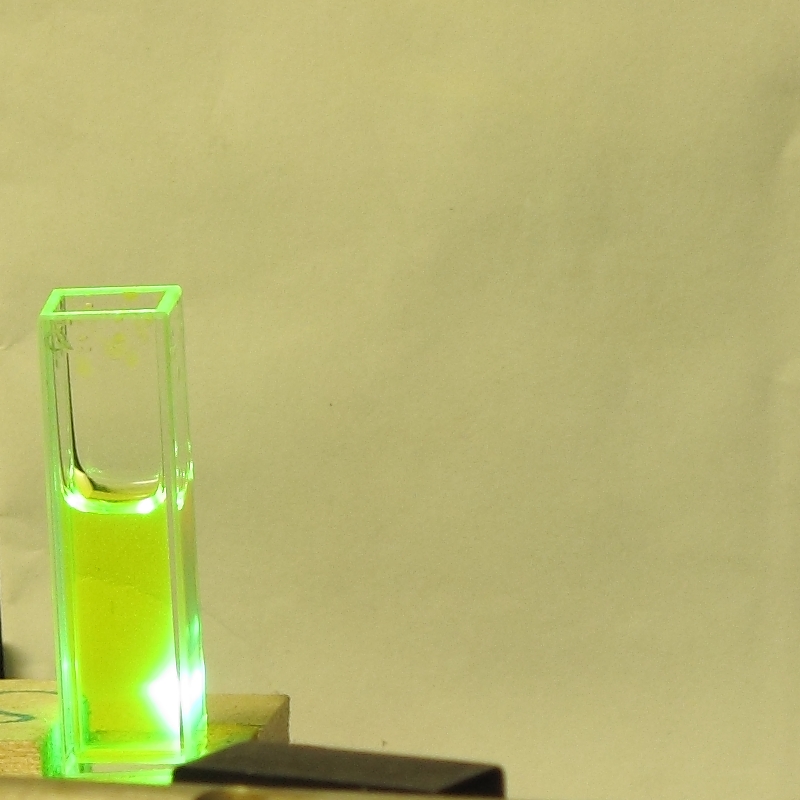
shining into the bottle. The third shows a few drops of
the ink in about 2 ml of distilled water in a fused
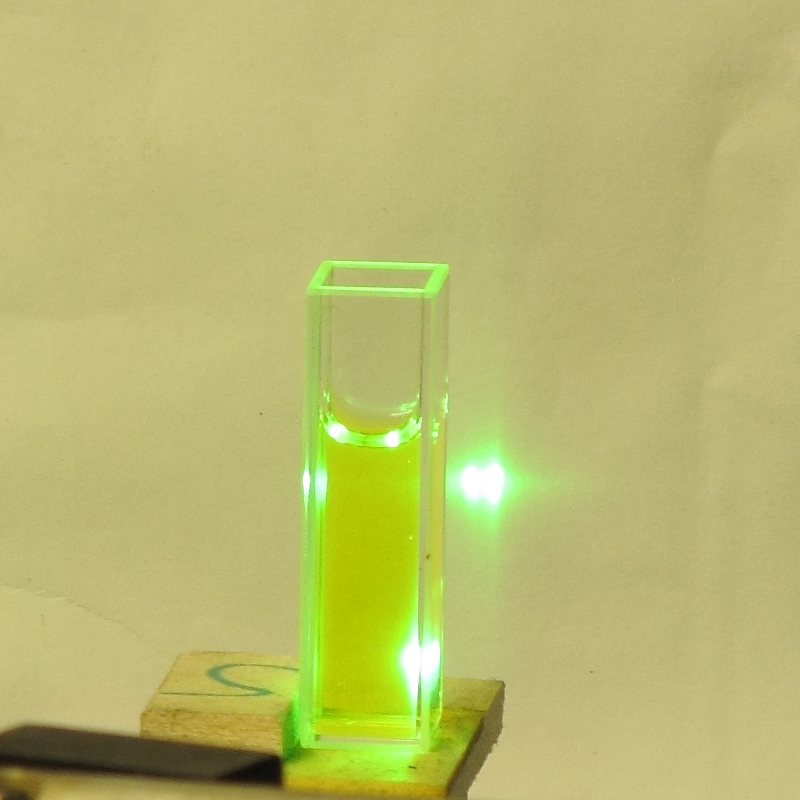
silica cuvette, and the last shows that same mixture
lasing. (The pump source for all of the fountain pen ink
lasers described on this page, btw, is our
PRA LN 1000
room-pressure nitrogen laser.)
Please note that I did not take the time to position the
cuvette properly, and a little of the pump light appears
to be passing by to the side of it. Even so, the dye is
lasing quite nicely.
Adding a drop of concentrated ammonia appears to shift
the fluorescence slightly toward the yellow, but I do
not know whether it changes the lasing threshold or
wavelength much. (The solution continues to lase,
though, so the change in pH probably doesn’t seem
to hurt anything.)
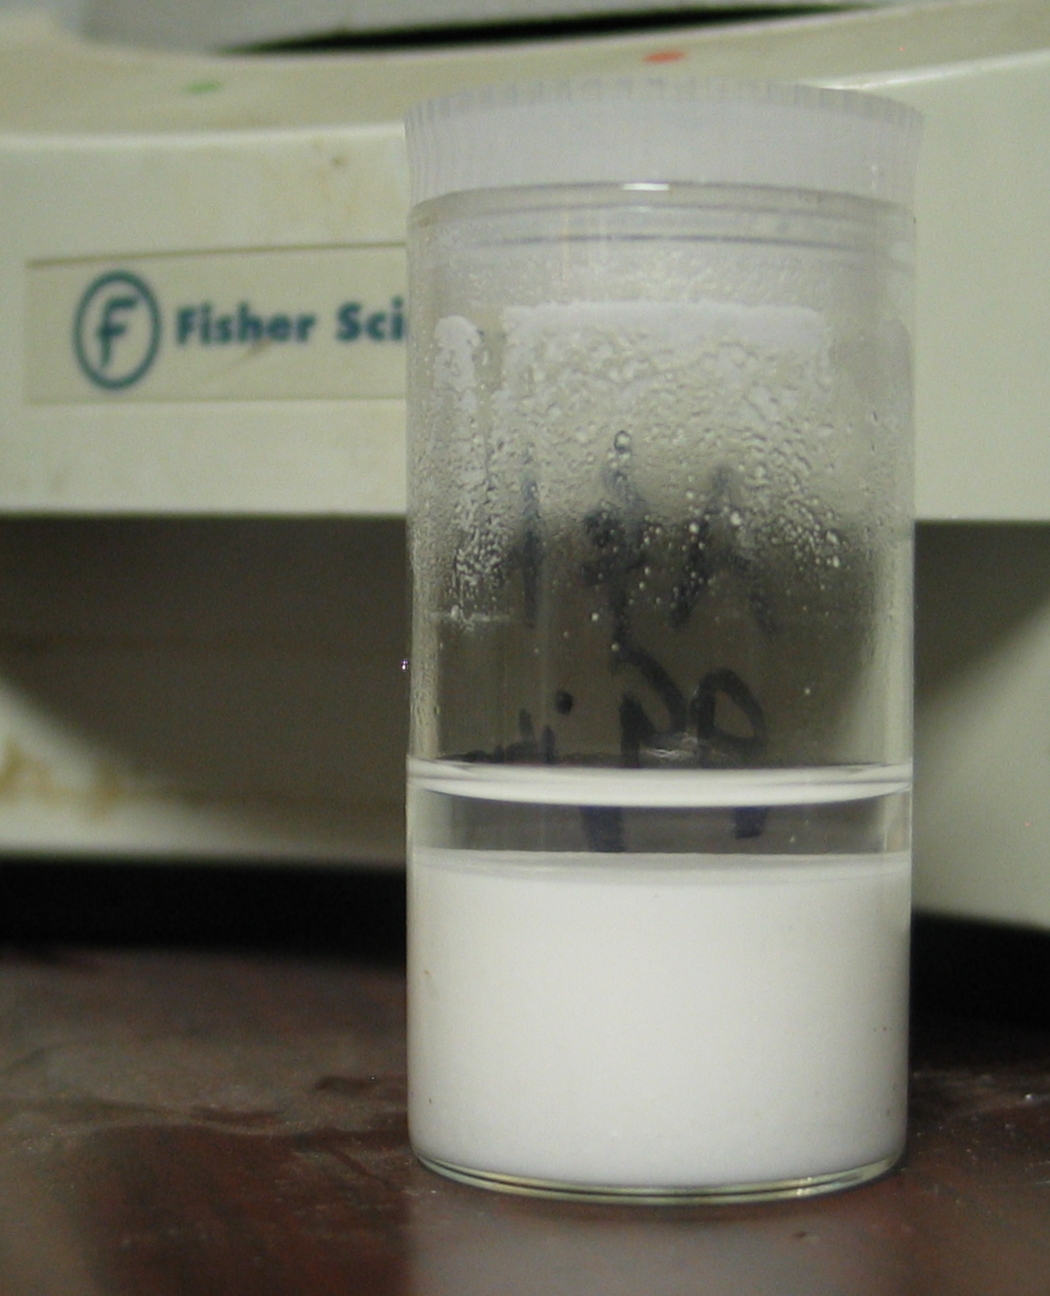
Diluting the ink into 99+% pure isopropanol produces a
turbid solution with moderate blue fluorescence.
I did not attempt to lase this solution, as I did not
have time to filter or centrifuge it. It is remotely possible
that there are two fluorescent components in the ink, but
more likely there is a pronounced solvent effect of some
sort. (Because the ink diluted well into distilled
water, I have not yet tried it in 95% ethanol.) I will
be looking into solvent issues further, when I have time.
(2011.0303)
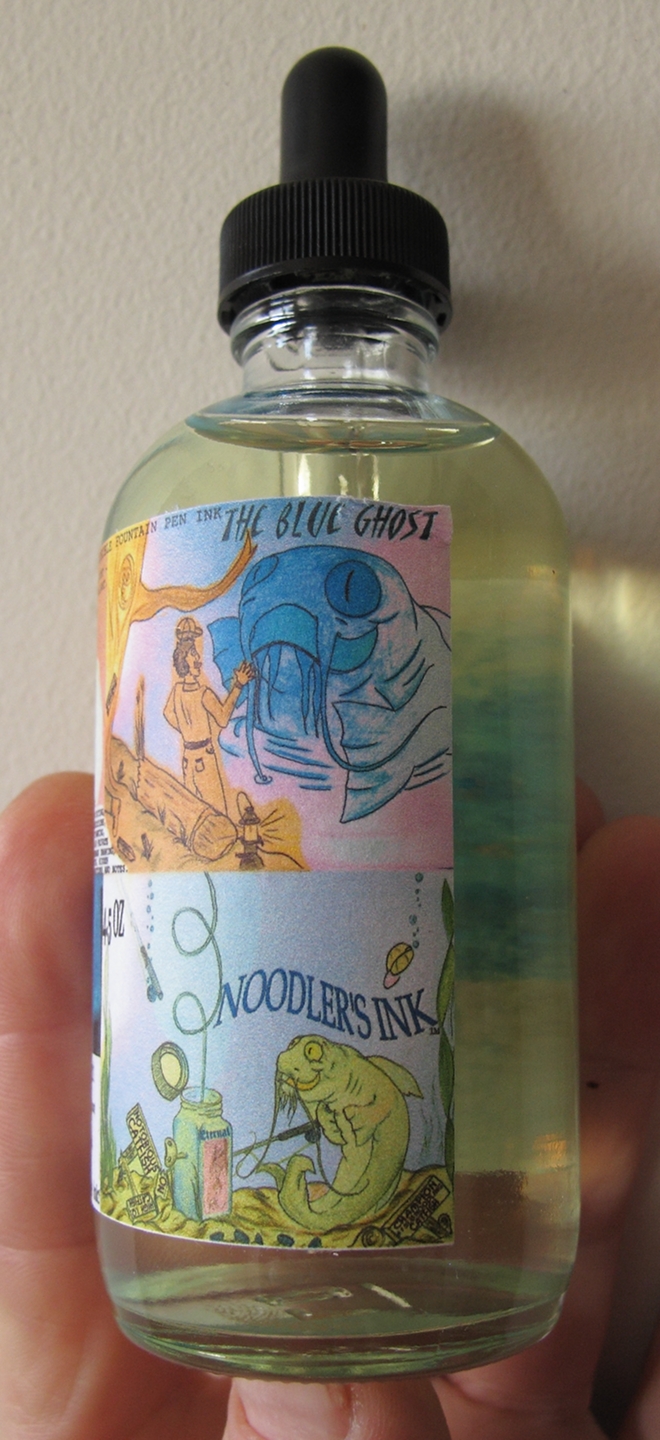
The second ink I tried was
Noodler’s
Blue Ghost fluorescent invisible ink. [NOTE, added
2018.0910: this ink is now listed as
“Bulletproof”. That very likely indicates a change
in the formulation; I have not tried to lase the new version.)
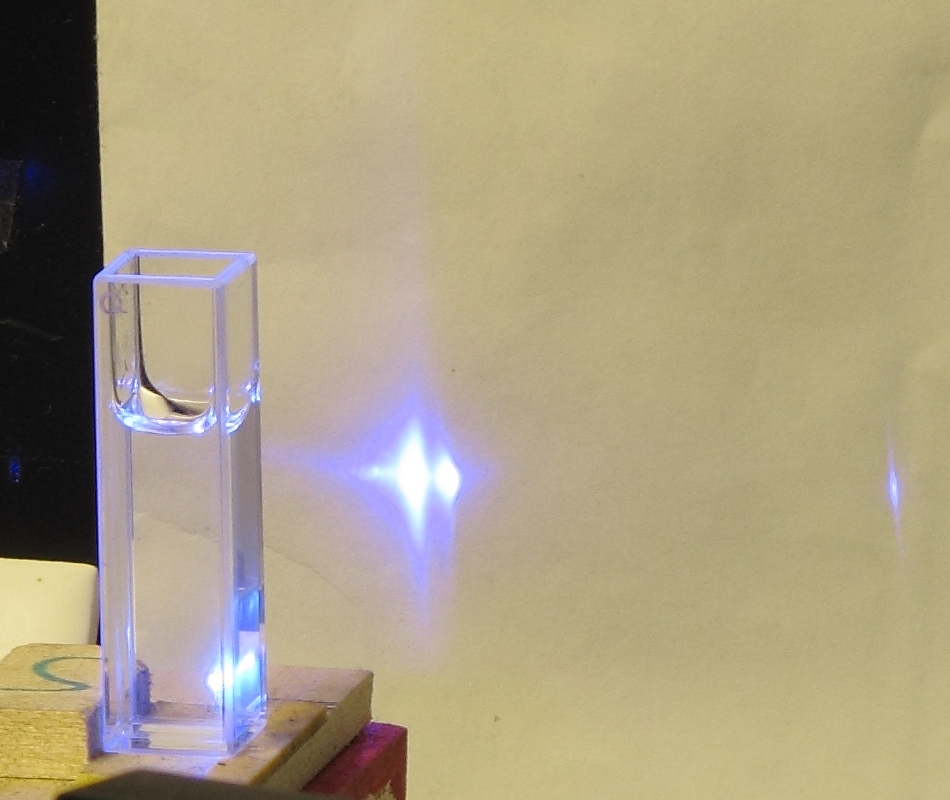
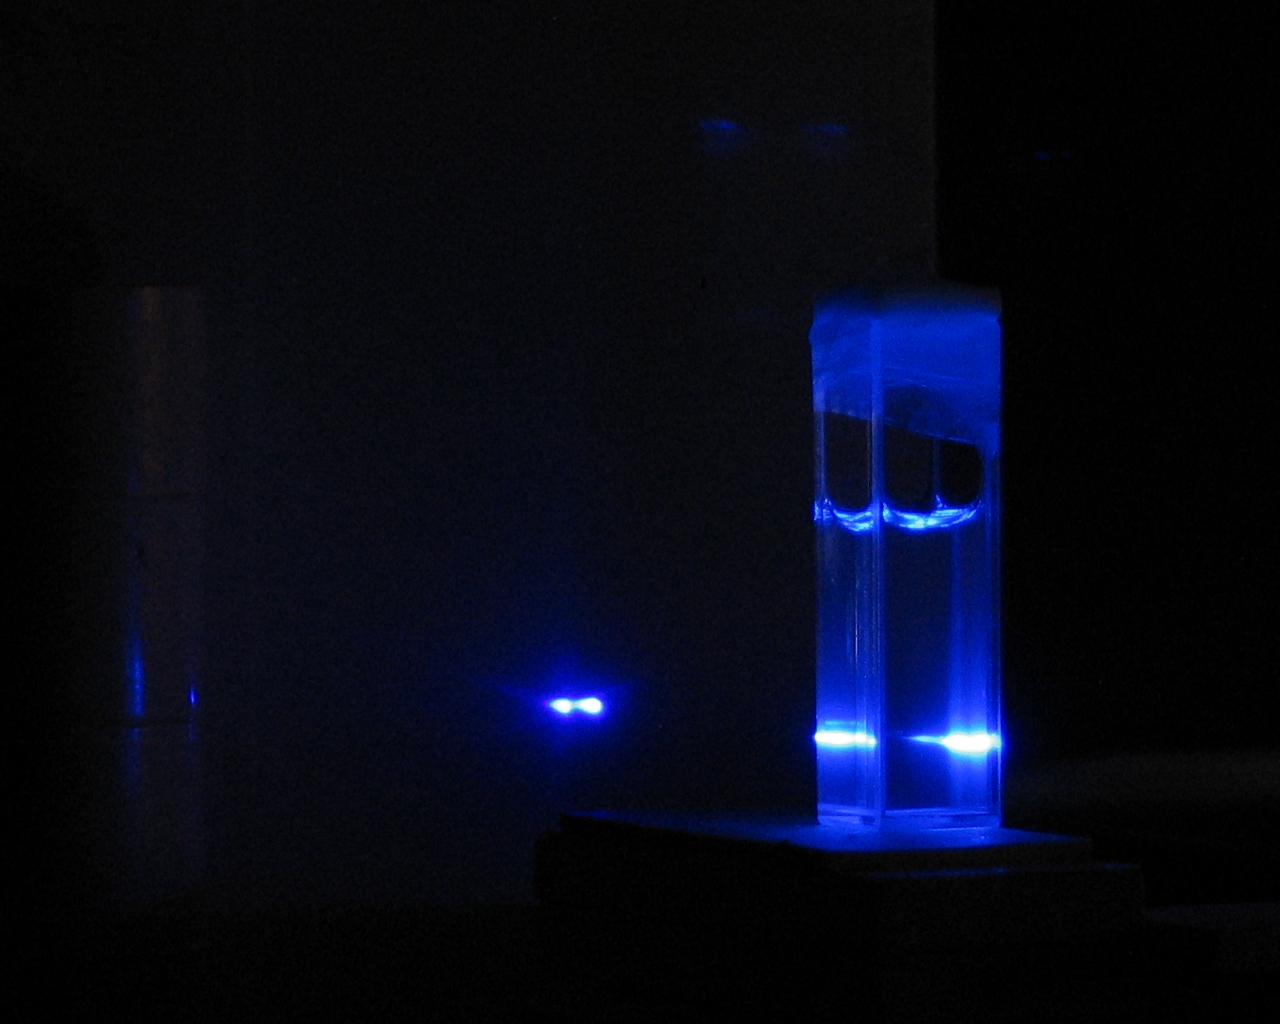
Just as with the Private Reserve Chartreuse, this ink
becomes turbid when I mix it into 99+% isopropanol. In
95% ethanol, however, it is transparent, and lases
extremely well:
(That’s about 8 drops in ~2.5 ml of Everclear. I’m
sure I could have used less.)
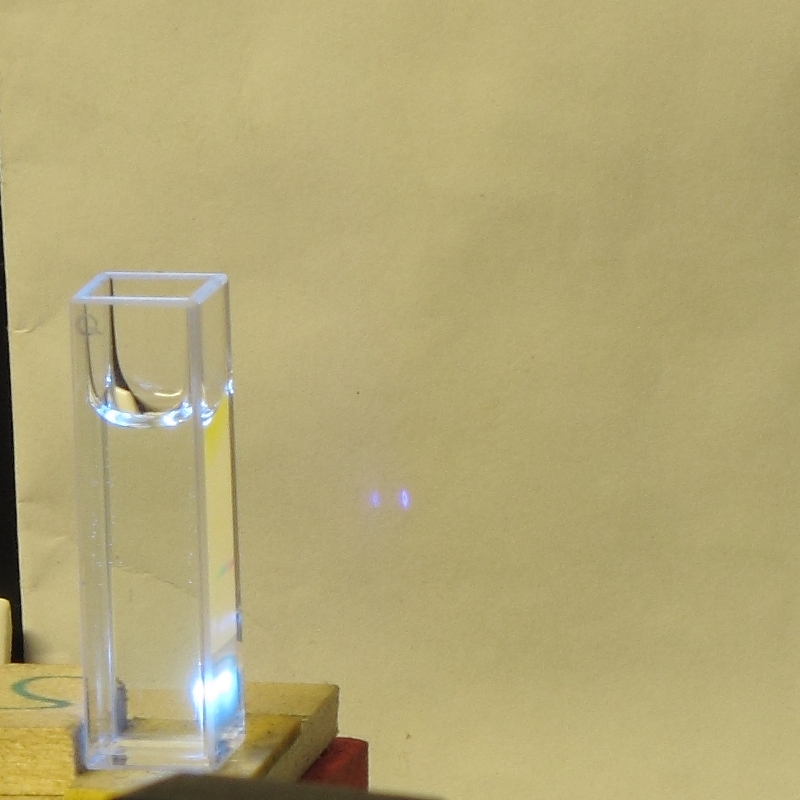
Blue Ghost also lases in distilled water, but I
had to use about 8 or 12 drops in ~2.5 ml, and the
lasing was not stable.
(This photo is much less bright than the best I saw
from the dilution in water, but I had difficulty
capturing a better image. The lasing decreased in
intensity very rapidly, and the LN 1000 is not
triggering correctly, so I could not predict when it
would fire.)
Note, btw, the difference in color between the two photos.
The ethanol solution fluoresces and lases a deeper blue.
(Solvent effects of this sort are fairly common.)
(2011.0304)
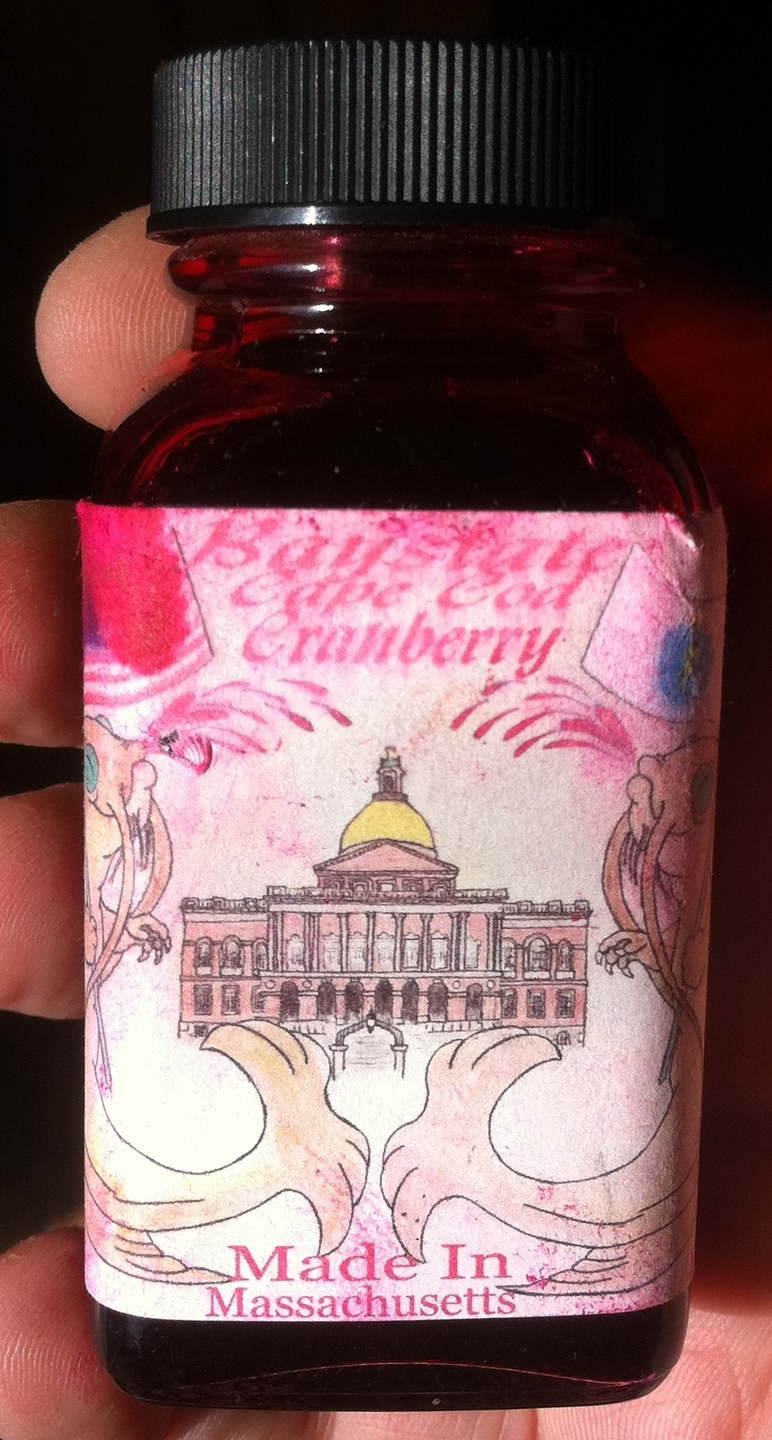
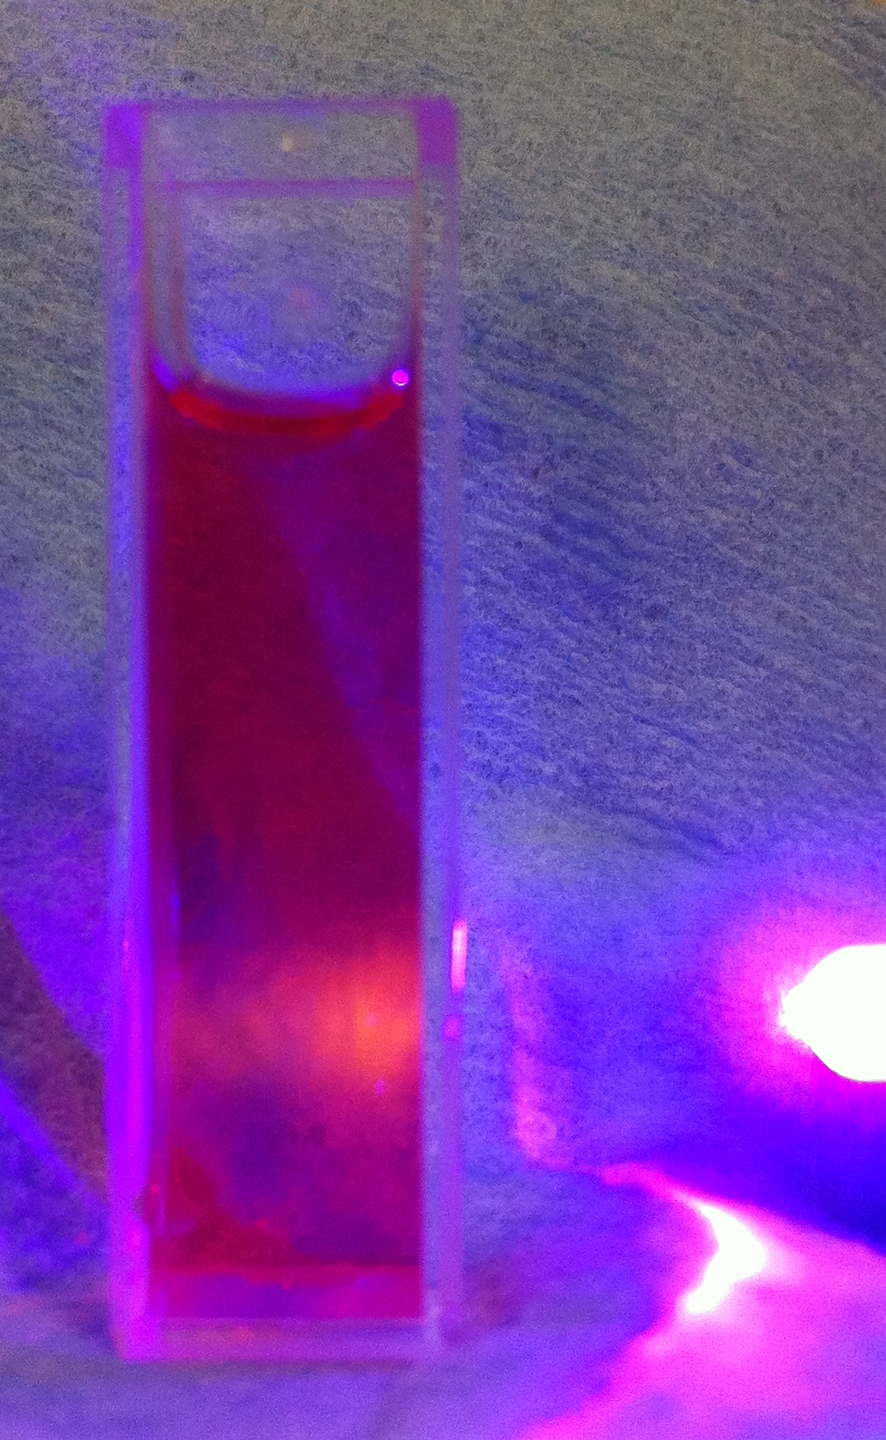
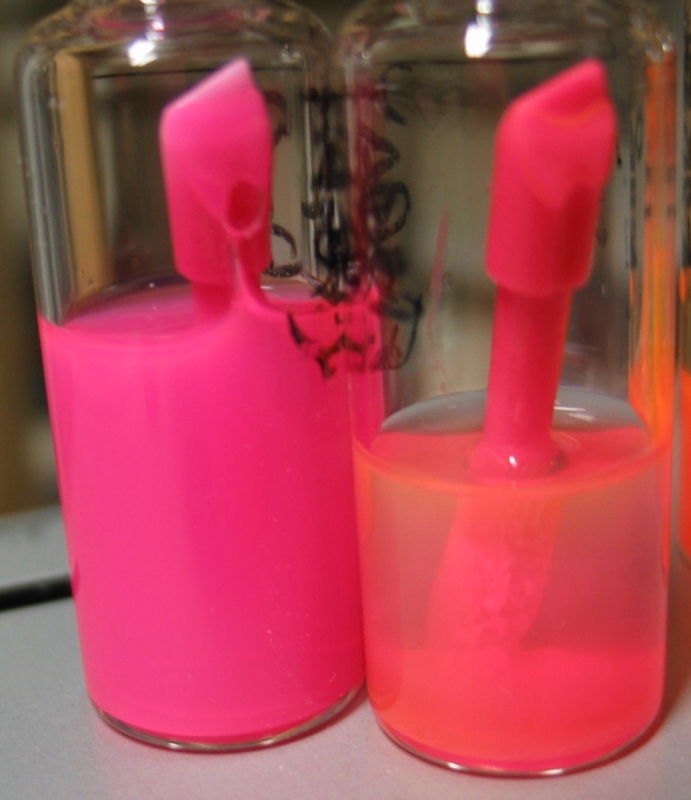
A few days ago I was cleaning a pen that had contained
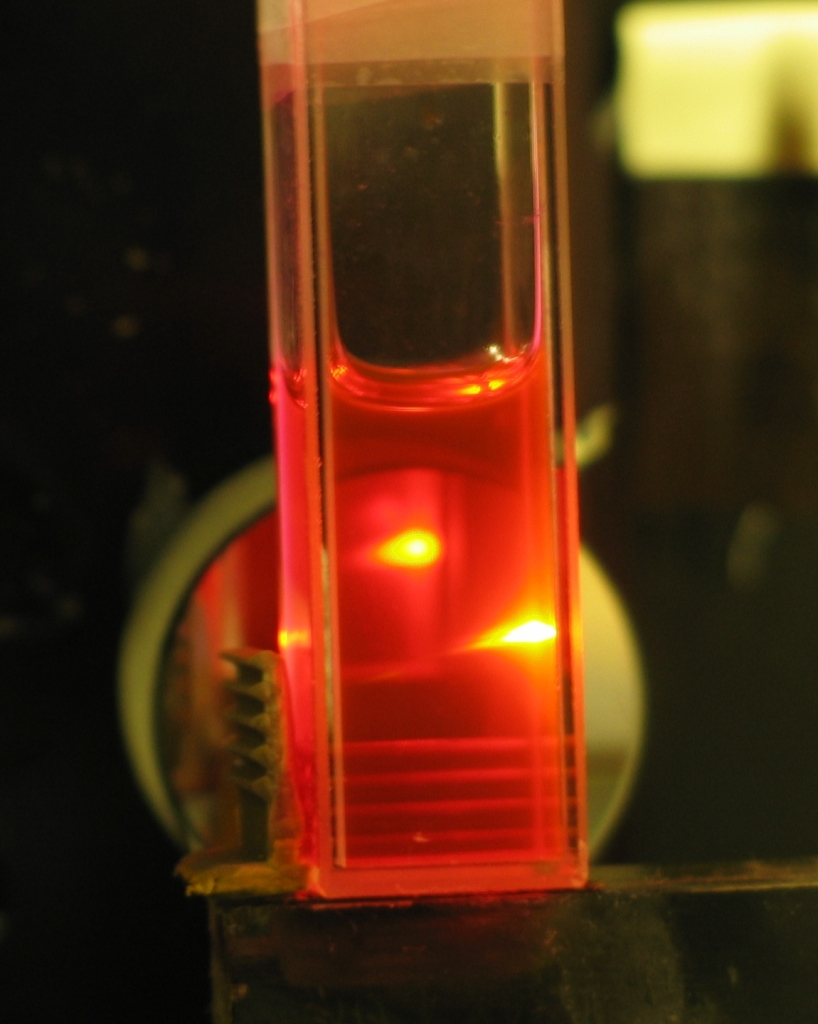
Noodler’s Baystate Cranberry...
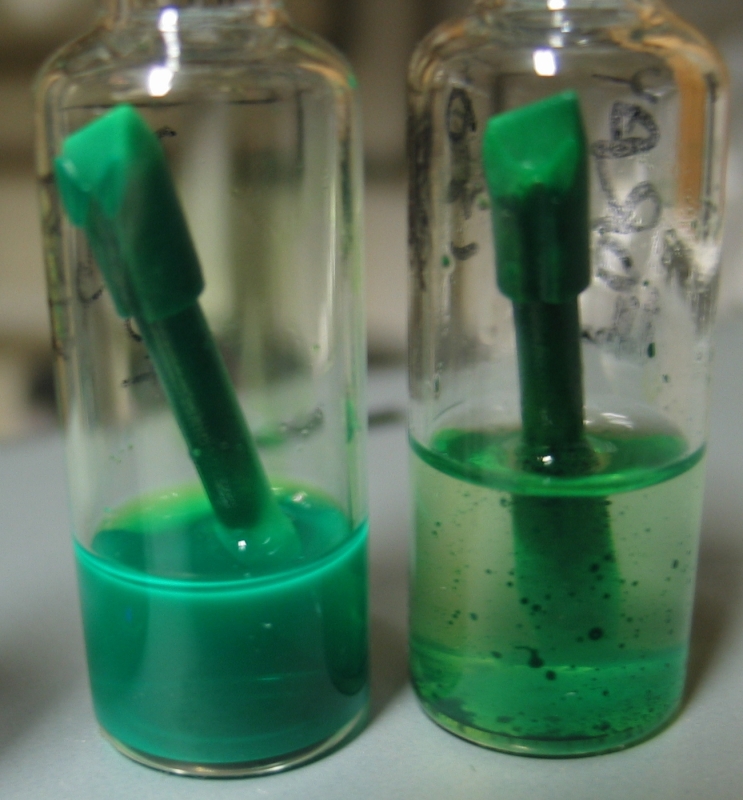
...and I noticed that the rinse water was strongly
fluorescent. I tried diluting this ink into distilled
water, but the result was disappointing (photo on the
left), so I diluted it into Everclear instead (photo on
the right). For each of these photos, btw, I added 3
small drops of ink to the solvent in the cuvette. The
illumination for the fluorescence is from a near-UV LED.
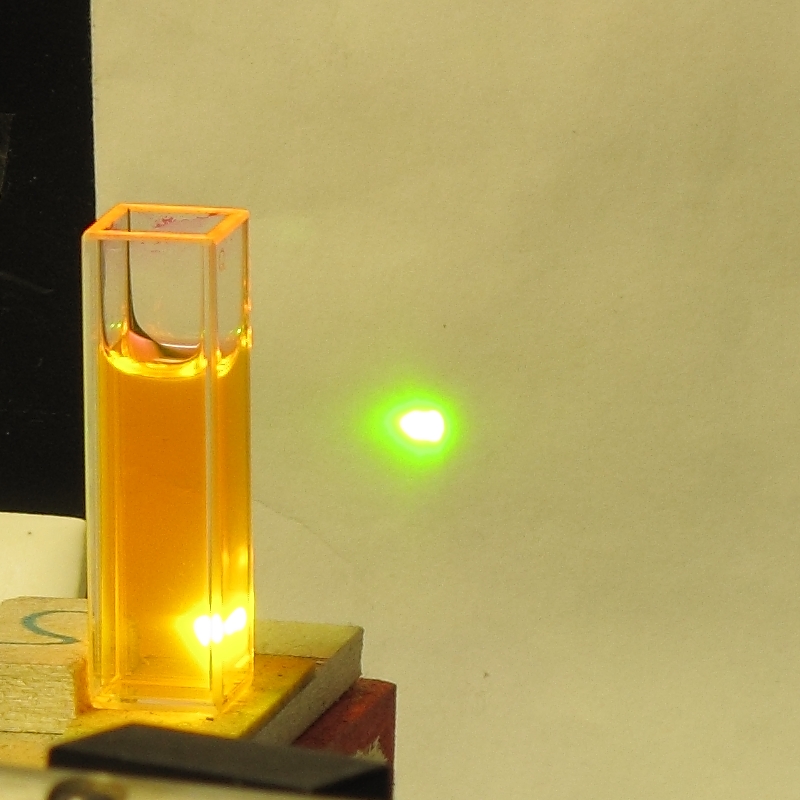
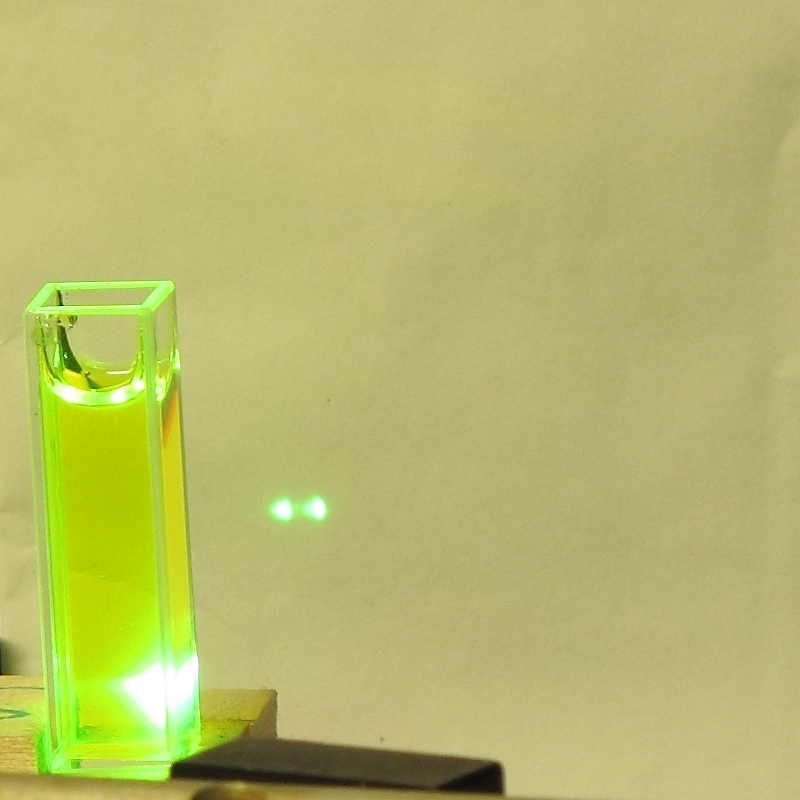
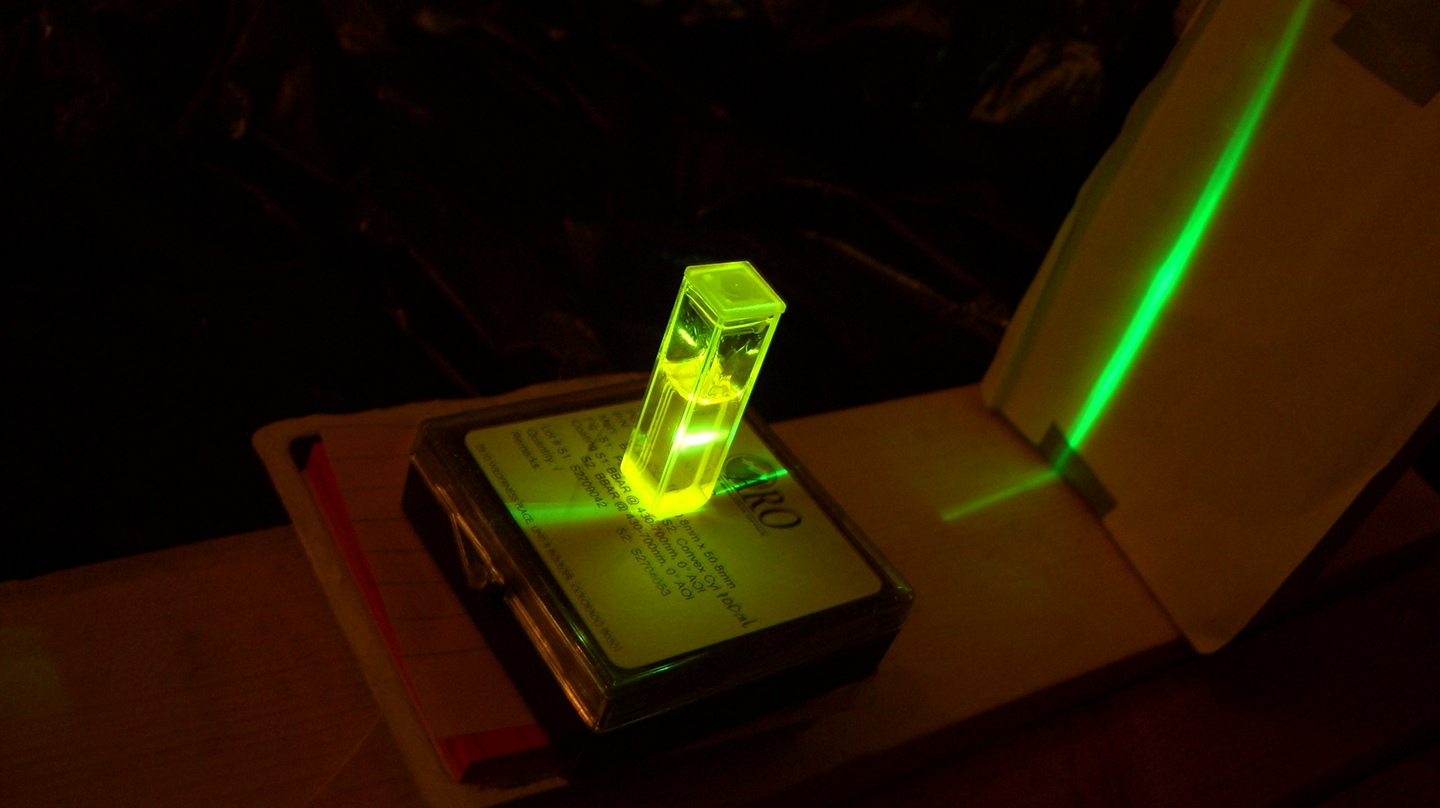
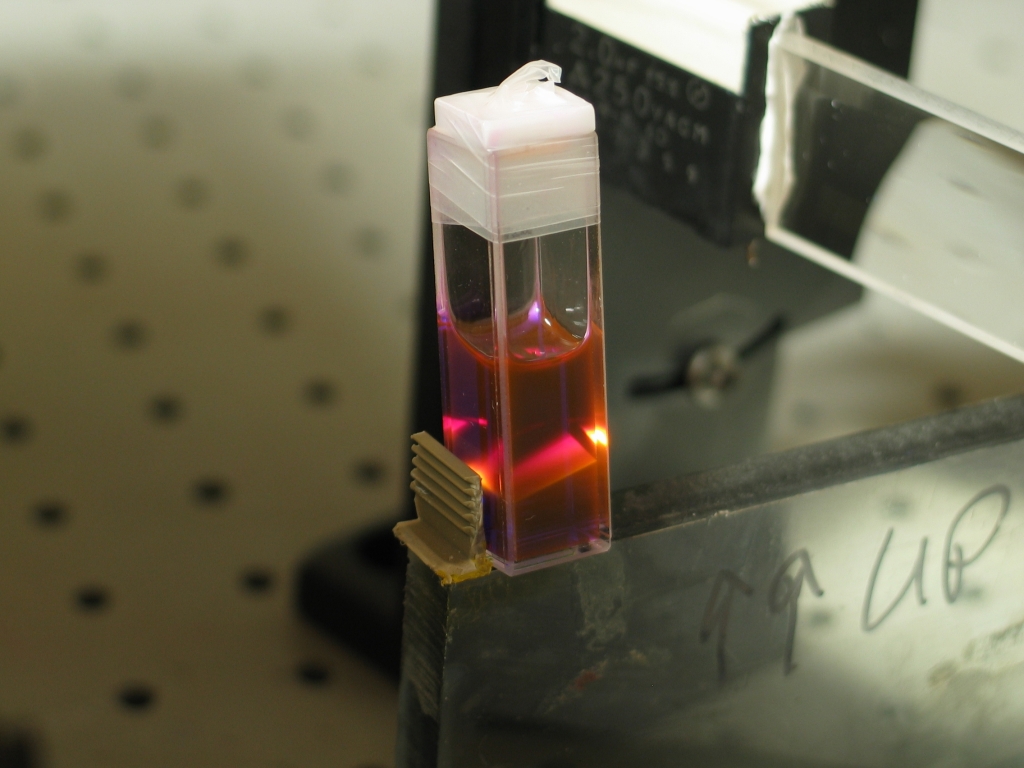
As you can see, the fluorescence is far brighter in
ethanol, and when I put the cuvette into the focused
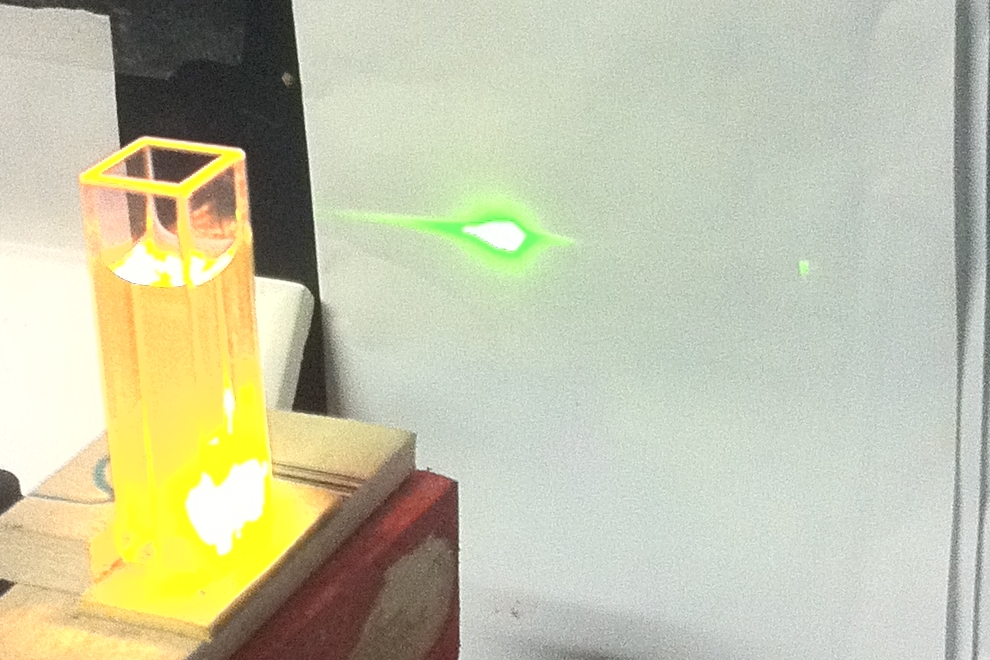
beam of the nitrogen laser it lased very nicely:
(The main beam is yellow; the green halo that you see in
the photo was not at all evident to the eye, and I am
not yet certain what may have caused it. Perhaps the ink
contains more than one fluorescent dye, or possibly
there is some particulate matter that is of the correct
size to scatter green light just a little, though I
would not expect either of those conditions to produce a
halo that the camera picks up but the eye does not.)
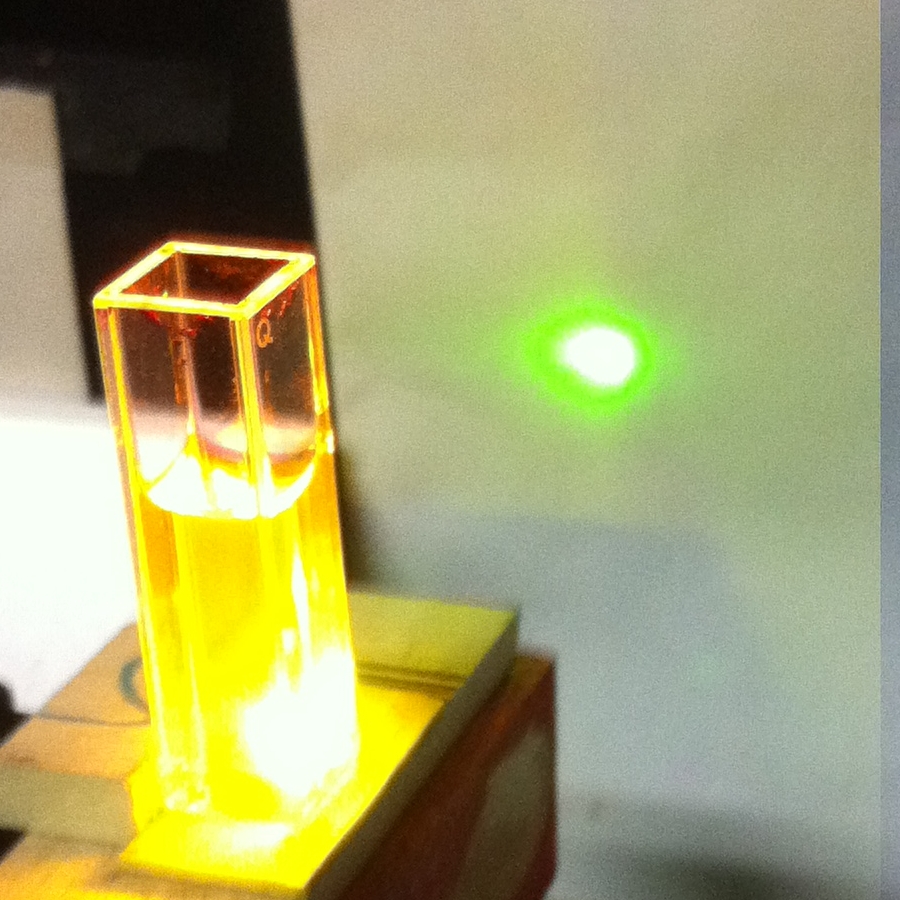
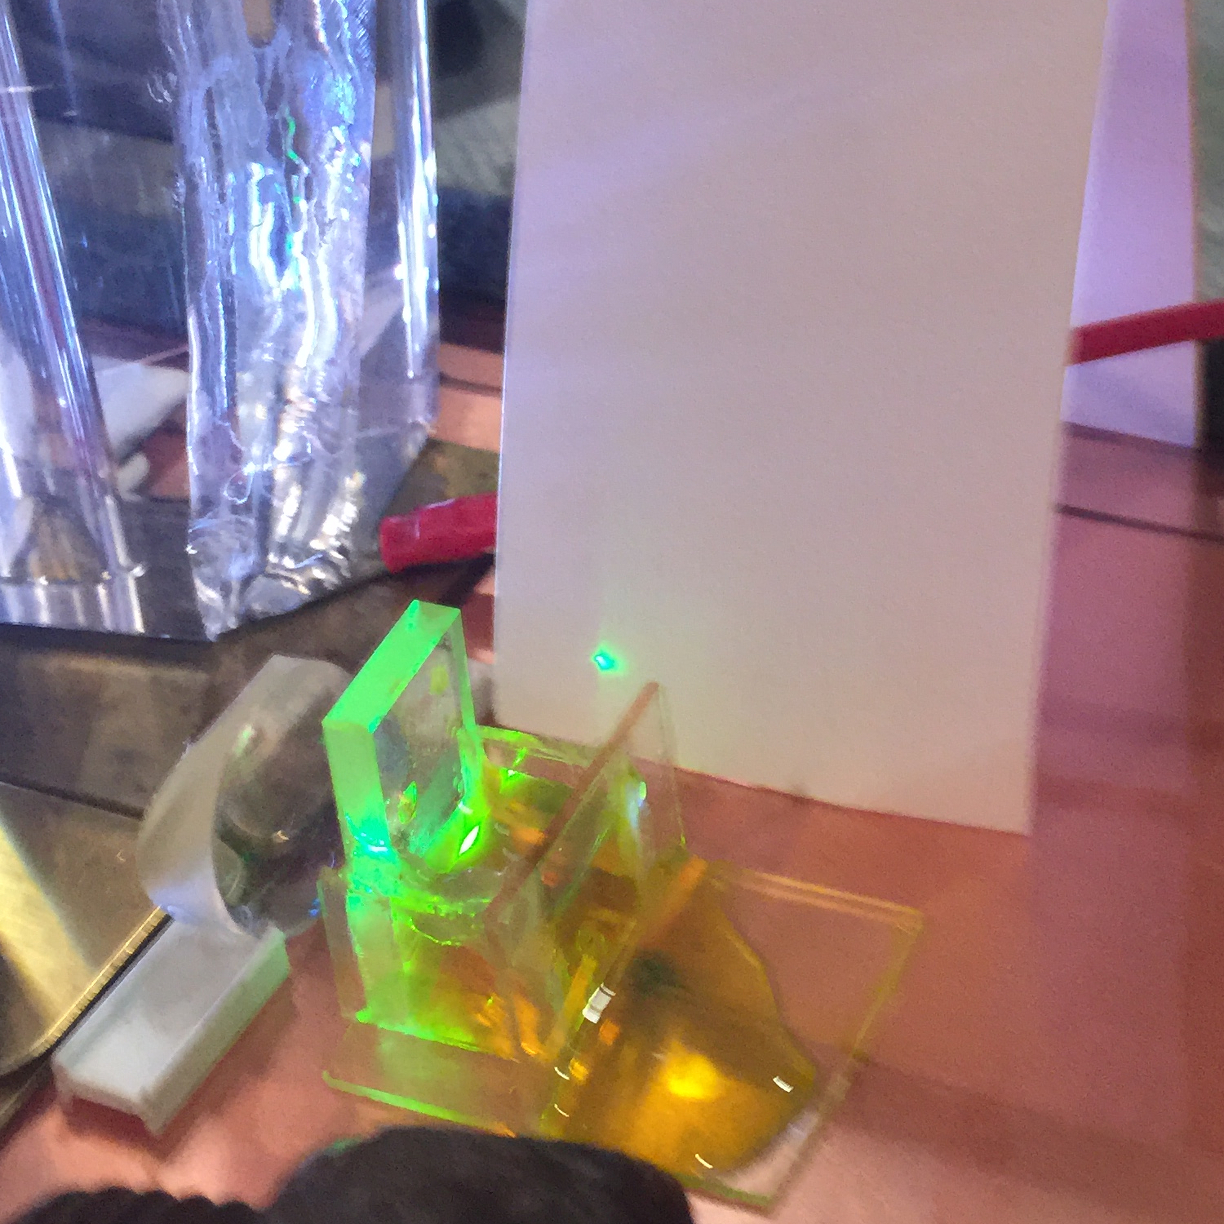
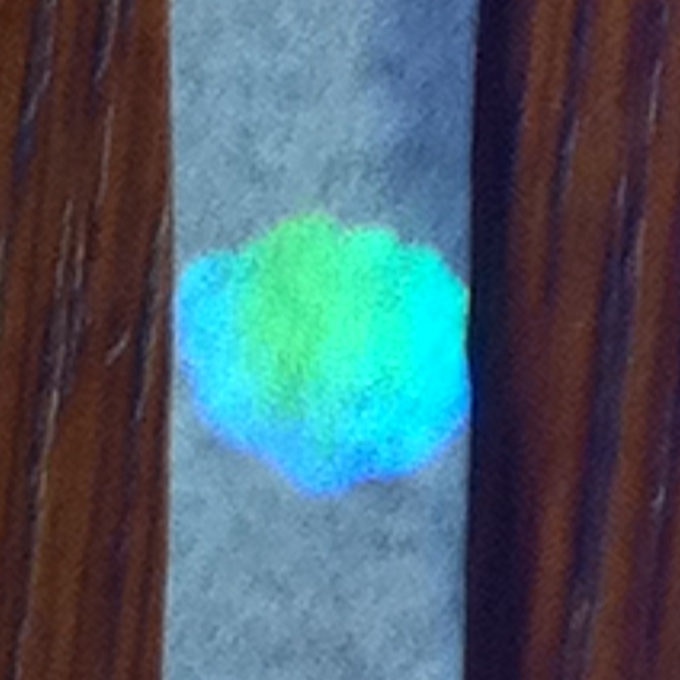
(2011.0305)
I checked again, and I definitely don’t see the
halo, but the camera in my telephone does:
I’m still very puzzled about what’s going on
here. (Note, added later: it gets even more strange;
see the addition from late 2013, below.)
(2011.0318, early AM)
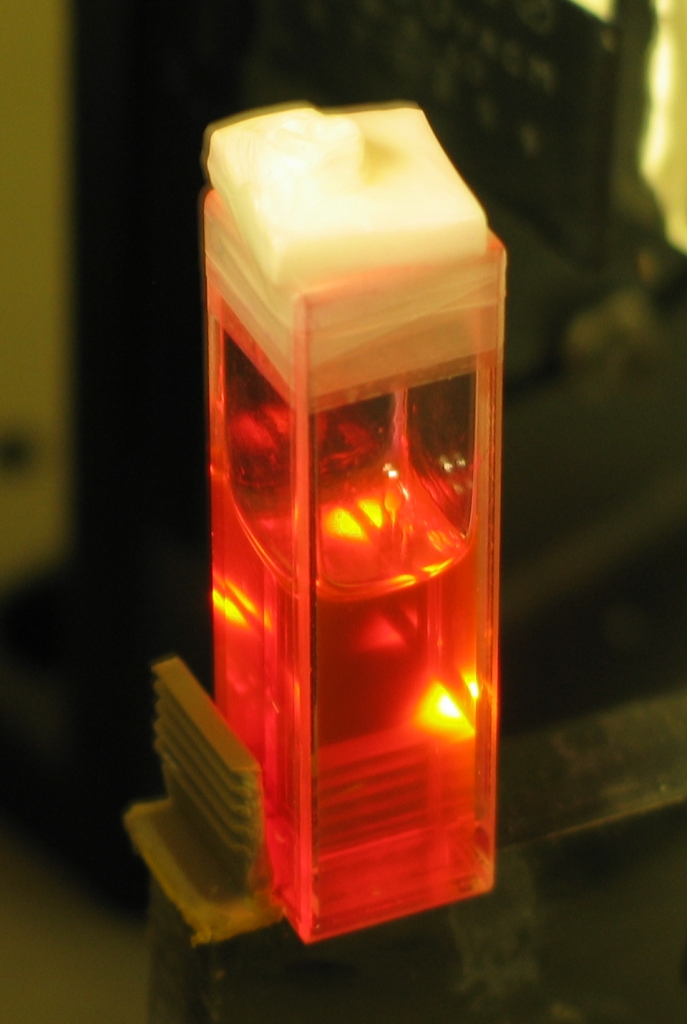
Since I wrote the description above I have tried,
several more times, to get this ink to lase in water. I
was unsuccessful. In the course of my attempts, though,
I found that it is totally incompatible with sodium
lauryl sulfate: if I add SLS to Baystate Cranberry that
I have diluted into distilled water, the solution
becomes darker red, and loses almost all of its
fluorescence:
I don’t recall ever having seen this behavior with
any commercial dye, though it is certainly possible that
a dye molecule could react with a detergent molecule,
and there is no guarantee that the result would
fluoresce particularly well. (There are other possible
mechanisms; I put that one forward only as a vague
guess.)
Baystate Cranberry is also incompatible with at least one other
detergent; with that one it still fluoresced, but became
turbid. [Note, added 2018.0910: this is in line with the fact
that Nathan Tardif, the owner of Noodler’s, strongly
recommends against mixing any of the Baystate inks with any
other type, as they generally clot. (They do seem to mix nicely
with each other.)]
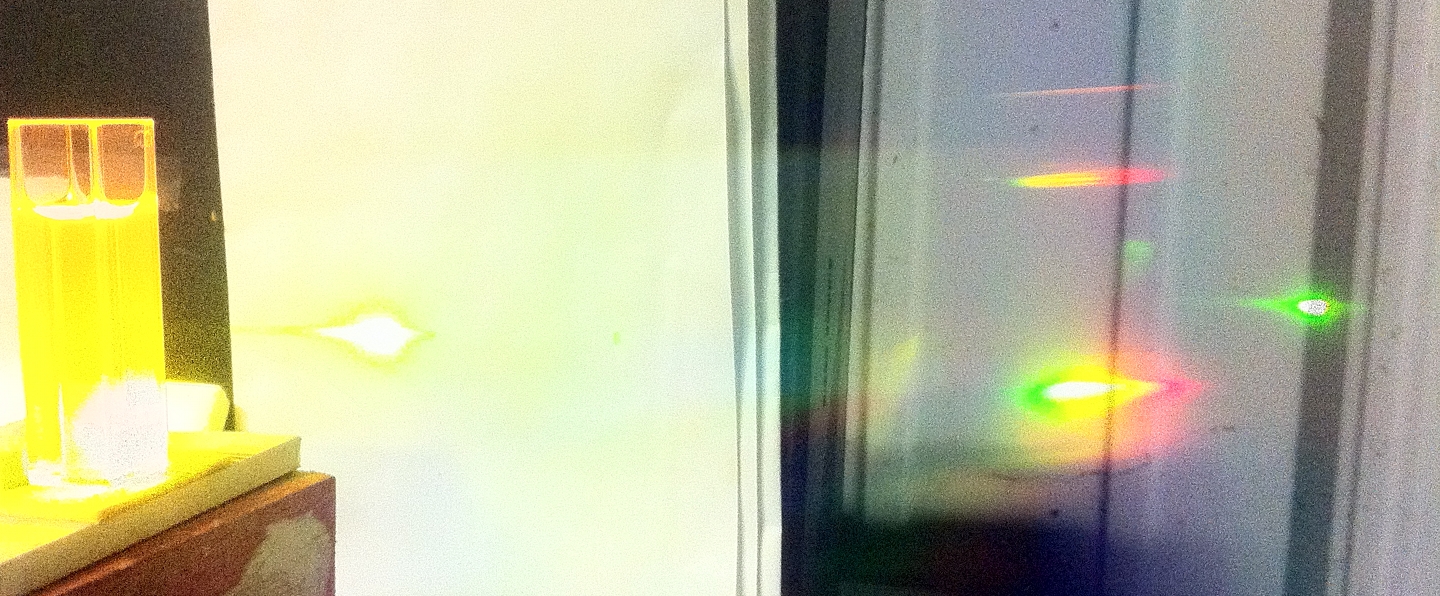
Meanwhile, I decided to take another look at the green
halo effect. Here is another photo, this time with two
small drops of the ink in about 2.5 ml of 99.85%
isopropanol:
(I suspect that even one drop would probably be enough.)
Here is what the scene looks like when I view it through
a diffraction grating:
It was suggested to me that the cameras could possibly
be picking up some NIR; at least the one in my phone
would probably show that as blue (my previous phone
definitely did pick up a bit of NIR, and equally
definitely showed it as blue), which could mix with
yellow to make some sort of green. (I say that with a
certain amount of caution. Blue and yellow do not
necessarily mix to make green. If they did, screens
would not be RGB and color printing would not be CMYK.)
As far as I can tell from this and several other photos,
though, that does not seem to be what’s going on
here.
What it begins to look like to me is that the response
curves of the eye are slightly different from those of
the cameras, and what I see as yellow the cameras
“see” as green. This is supported by the
fact that the center spot inside the green halo in each
of the photos above is actually white: the sensor has
been overdriven. This is even true in the spectrum of
the dye fluorescence in the last photo. (It’s the
lowest one.)
(Midday, same day)
The only thing for it is to run the output of the laser
through the monochromator, and find out the wavelength.
We actually have a small monochromator here, which seems
to calibrate well to HeNe (shows it at about 633 nm),
and I hope to perform this test some time soon. I may
even be able to calibrate the monochromator to the
sodium D lines, which are very easy to produce and which
should be very close to the wavelength that this dye is
putting out.
(Later that afternoon)
With both slits wide open, which makes it easier but
considerably exaggerates the bandwidth, I get an uncalibrated
range of 558-587 nm. This is probably closer to 568-577 nm
actual uncalibrated range. (I have checked the monochromator
against a green DPSSL laser, and I get a range of nearly 20 nm
with the slits open, so we have to knock perhaps 10 nm off each
end of the range I recorded for the dye. The center of the range
is about 533 nm, so the reading is only about 1 nm high if the
DPSSL is based on Nd:YAG, or about 3 nm high if it’s based
on Nd:YVO4, both of which are or at least have been
typical.) These parameters suggest that the actual output range
of the dye is close to 567-576 nm. I’m afraid, however,
that you need to take all of this with a grain or two of
salt. It was a quick handheld measurement, and not really
reliable. At some point when I have time, I will redo this
measurement with the slits narrowed down further, the dye laser
output actually aimed into the monochromator, and the
monochromator output displayed on a target.
In any case, if my initial measurement is not too far
off, the color should be a slightly greenish yellow.
Unfortunately, not only will the perception of this vary from
person to person, but in addition the information on the Web is
not as accurate as I would like. Just for example, I have seen
one page that lists green as 510 nm. That’s much too
short. Laser pointers that emit 532 nm are seriously green; by
the time you get to wavelengths even as short as the common
argon laser line at 514.5 nm, you have a color that is somewhere
between cyan and blue. (To my eyes, the thallium emission line
at 535.0 nm is about as green as it gets. YMMV.)
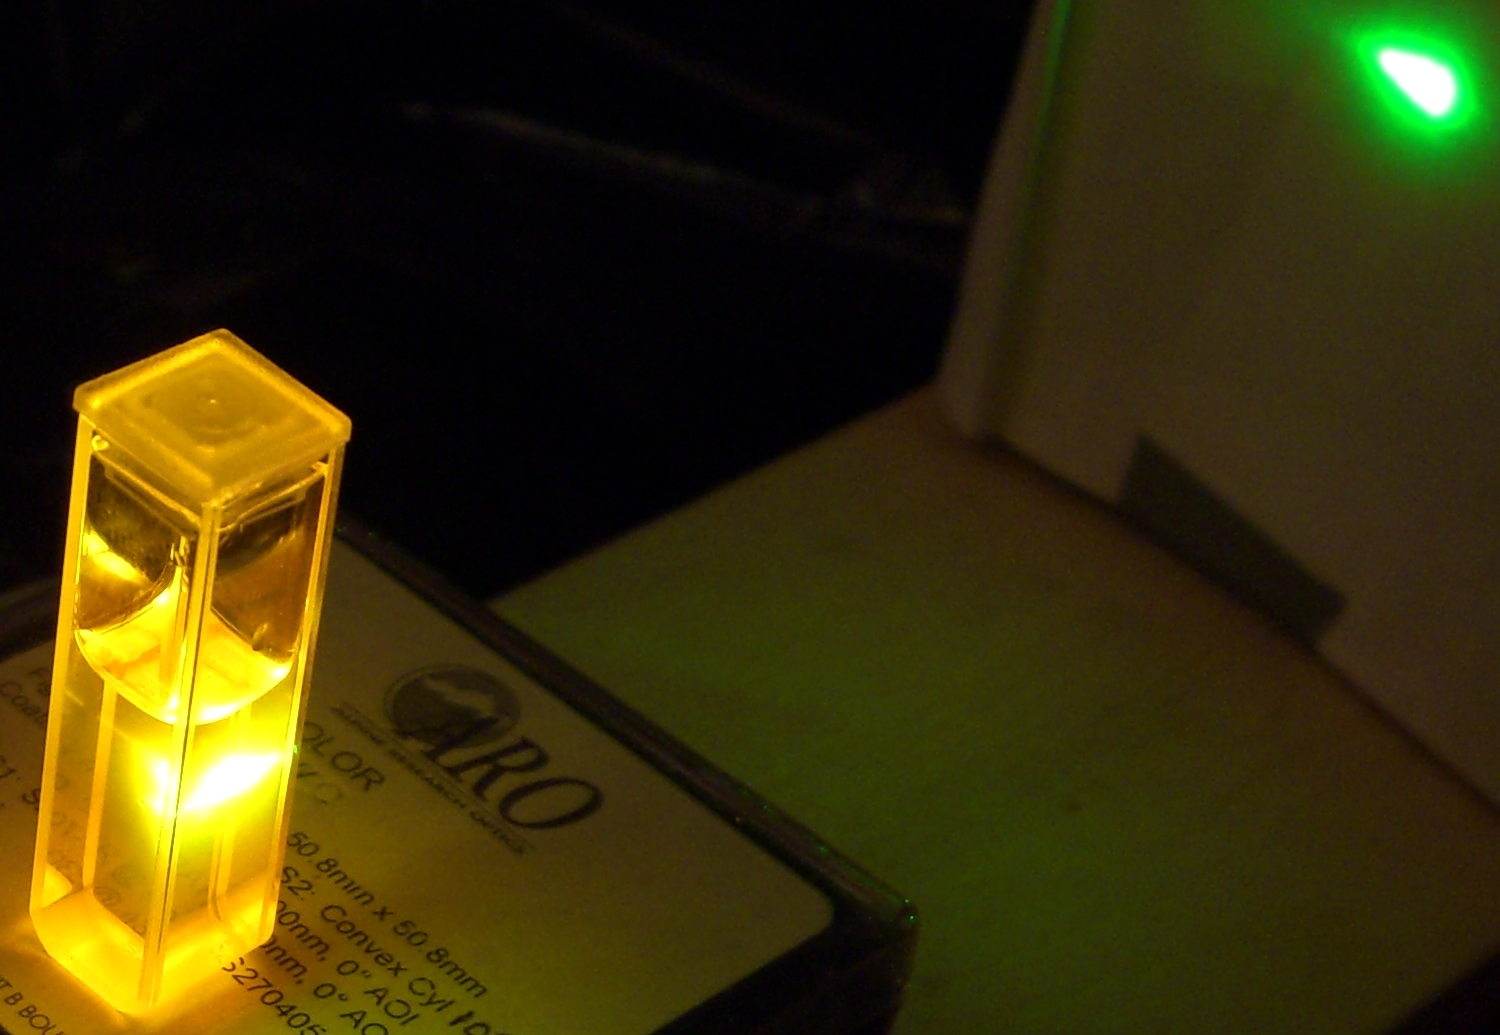
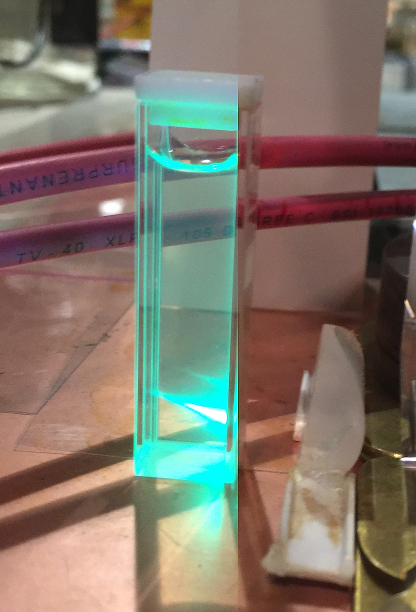
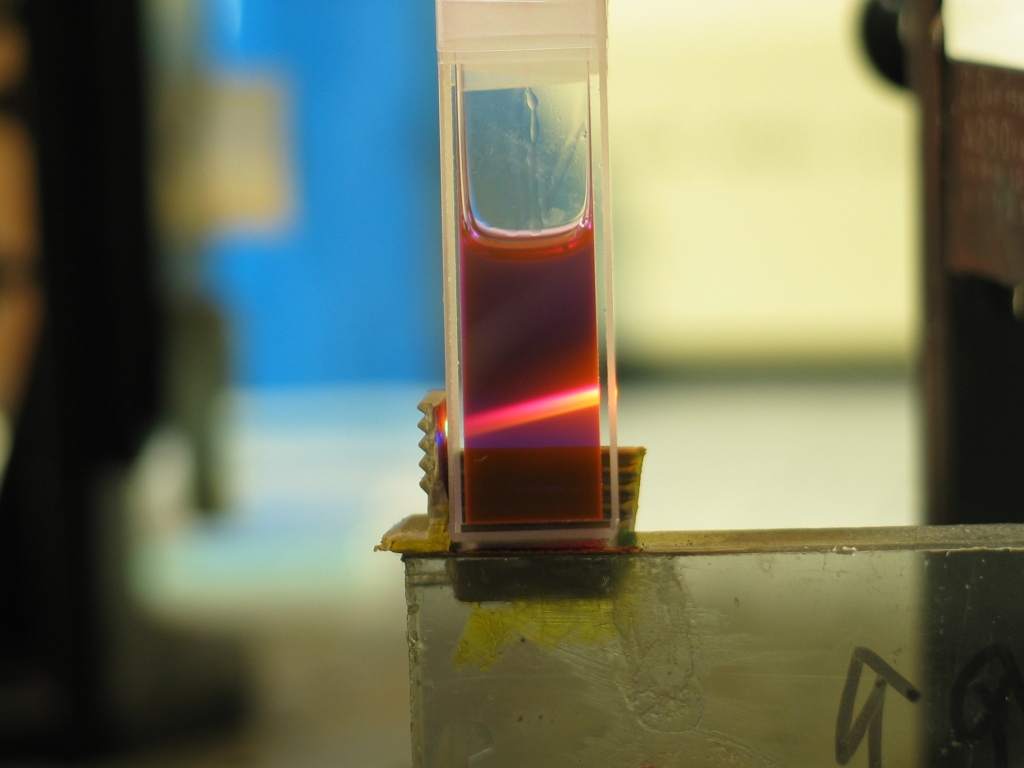
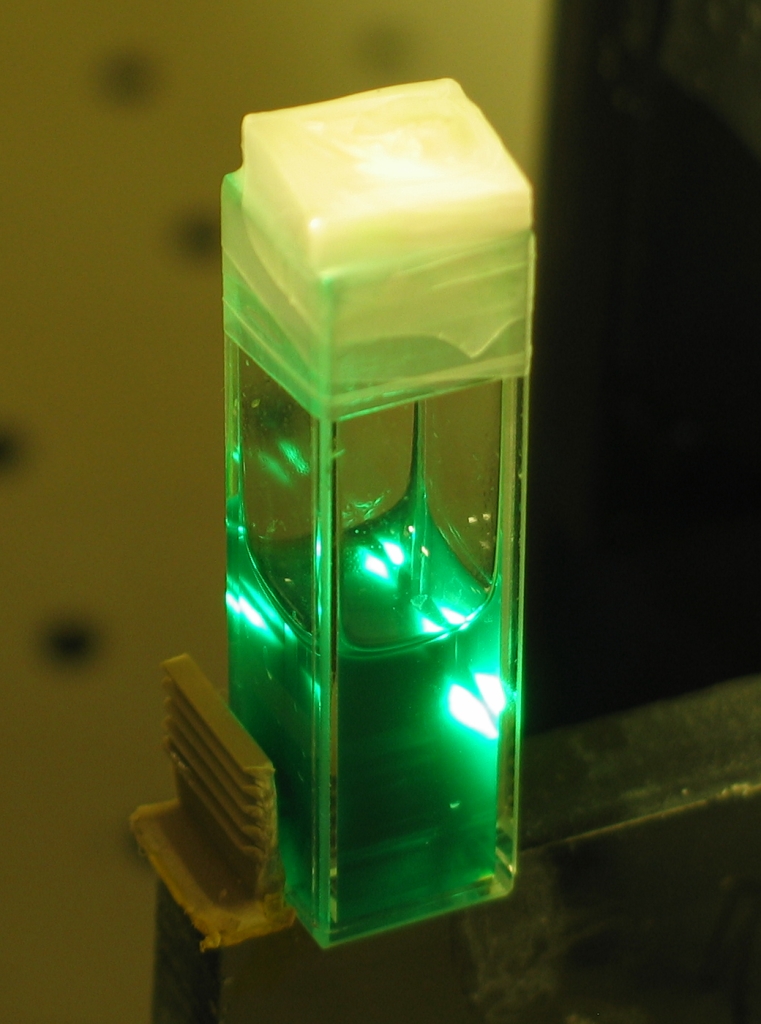
(2013.1028)
Holger Jaenisch (mentioned above) obtains very green
output from this ink if he puts it in a narrow cuvette:
(I think that his example was pumped by a
PRA LN-1000 TEA nitrogen laser.)
It seems (to me, at least) quite amazing to see
brilliant yellow fluorescence and green lasing.
(2011.0310)
The Noodler’s folks, I regret to say, appear to have
discontinued their “Firefly” highlighter ink.
I hope they will eventually reissue it.
Note, added 2018.1012: this ink seems to be available, at
least on eBay. [Further note, added 2022.1109: I have lased the
current version of Firefly, by mixing it into a solution of
4-Methylumbelliferone in isopropanol and ammonia. I was obliged
to do this because my current nitrogen laser is a homebrew
device that is not fully optimized, and the channel is filled
with air rather than nitrogen. (At some point when I have more
time and energy, maybe I can do a writeup on the subject of
‘translator’ dyes, as it is somewhat involved and
tweaky.) In any case, I think it’s worth noting that the
somewhat basic pH of the 4-MU solution did not interfere.]
Here is the label, slightly wet (mea culpa):
I tried diluting this ink into 91% drugstore isopropyl alcohol,
and found that 6 drops into about 2 ml would not lase:
It is possible that a more concentrated solution might
work, but it turns out that this ink lases well in
distilled water, and I haven’t tried iso again yet.
(Note the slightly more yellowish color of the water
dilution. If “Firefly” will lase in
isopropanol, there is a good chance that the color of
the laser light will be slightly shifted toward the
blue. I may try that at some point, and if I do I will
also try it in ethanol, to see whether the same is
true.)
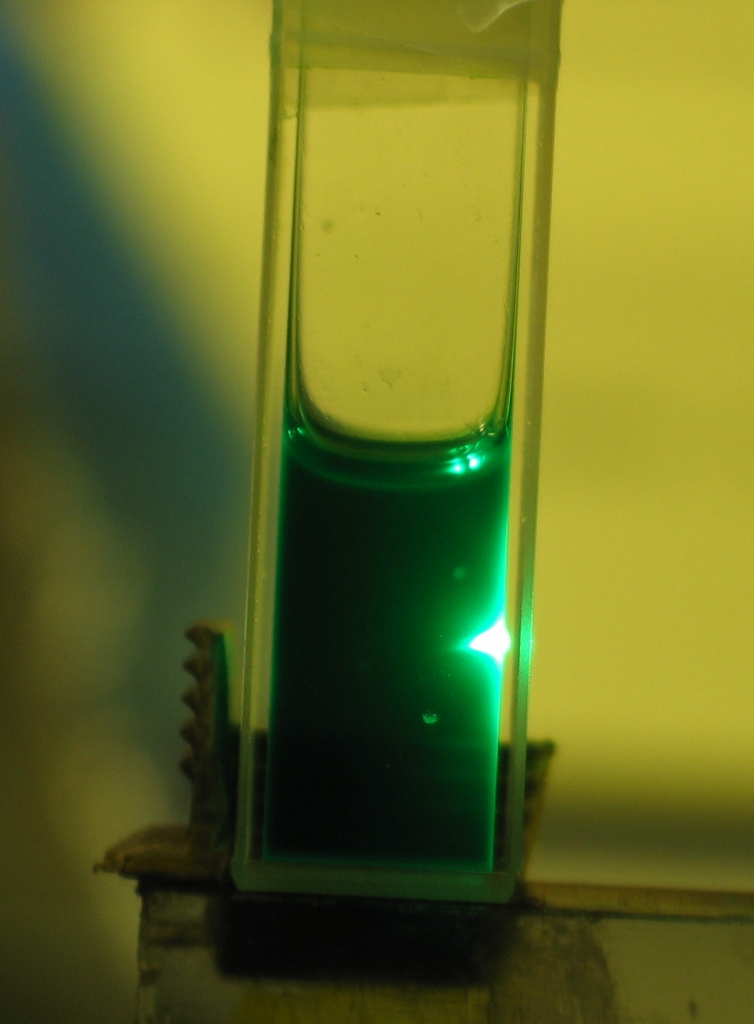
Note, added 2018.1012: I have determined that
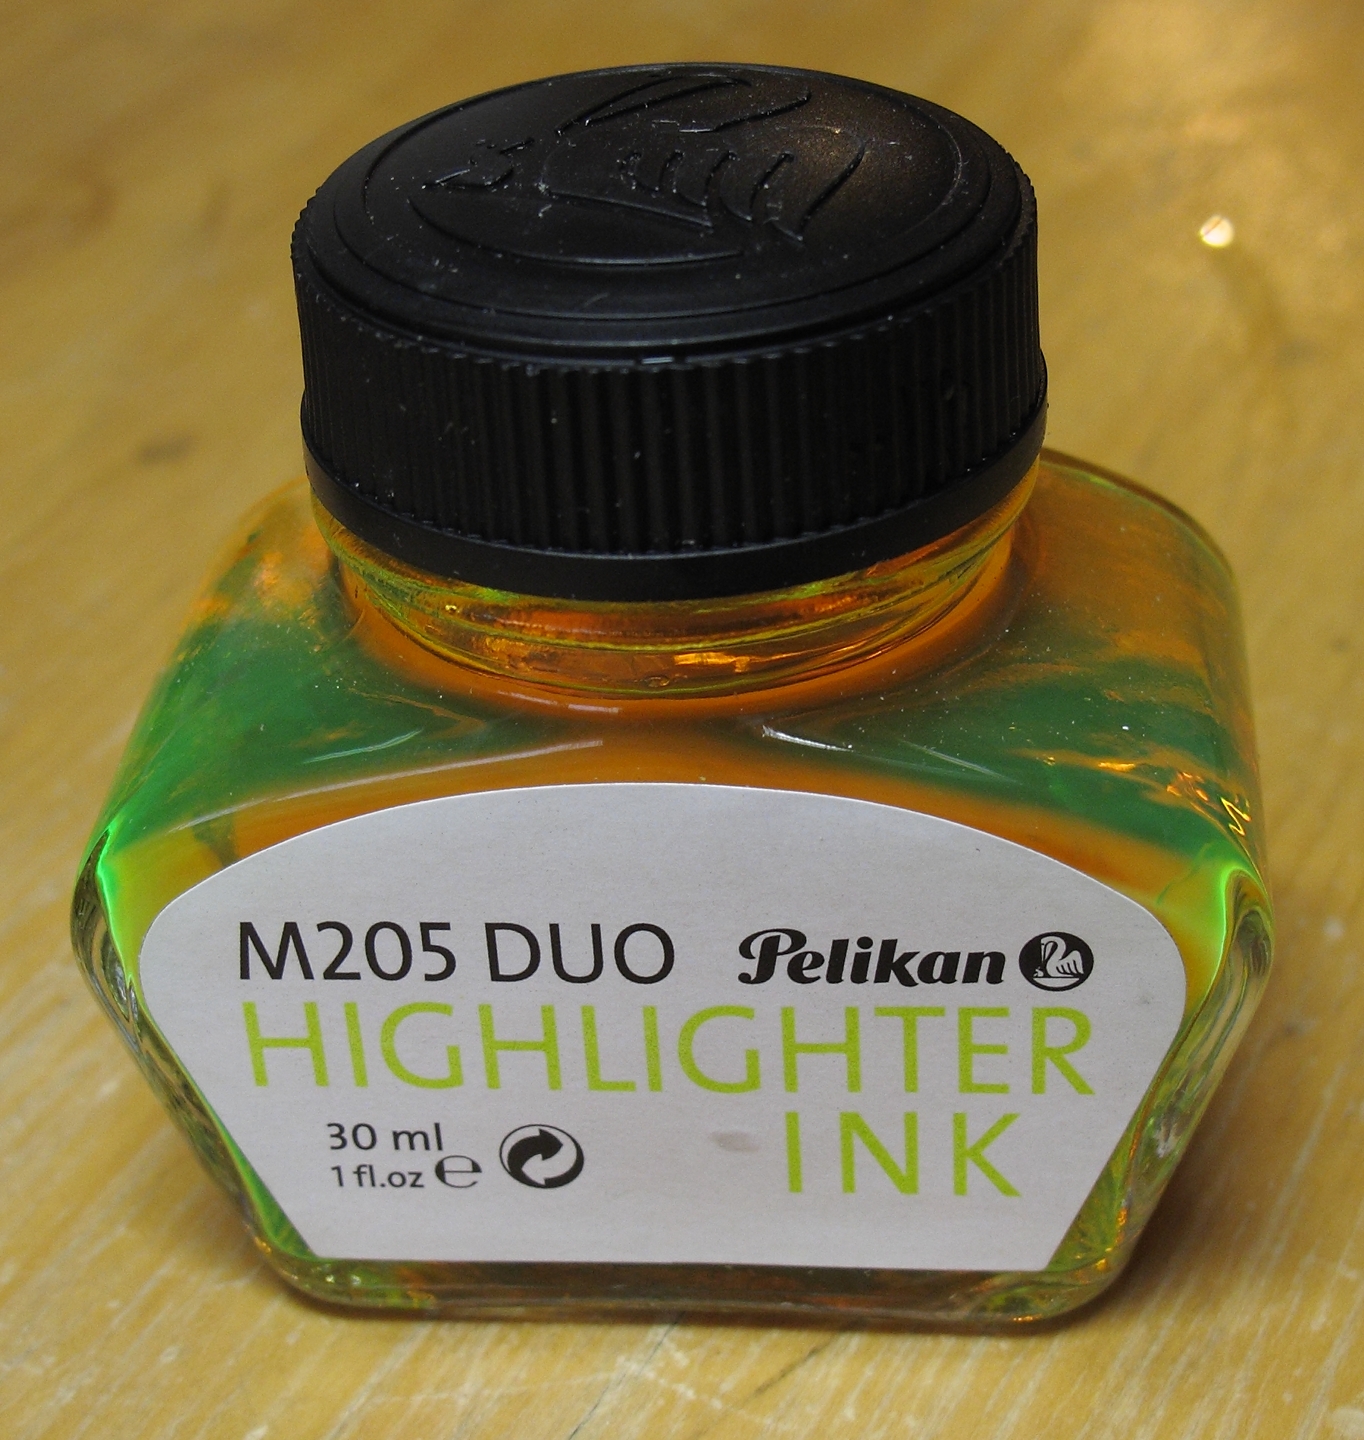
it lases, though somewhat weakly, undiluted:
At the moment it is slightly difficult to get
Pelikan’s M205 Duo highlighter ink if you
don’t want the accompanying pen (which is fairly
expensive), but we are assured that they will eventually
reissue it. I looked around a bit, and managed to find a
bottle:
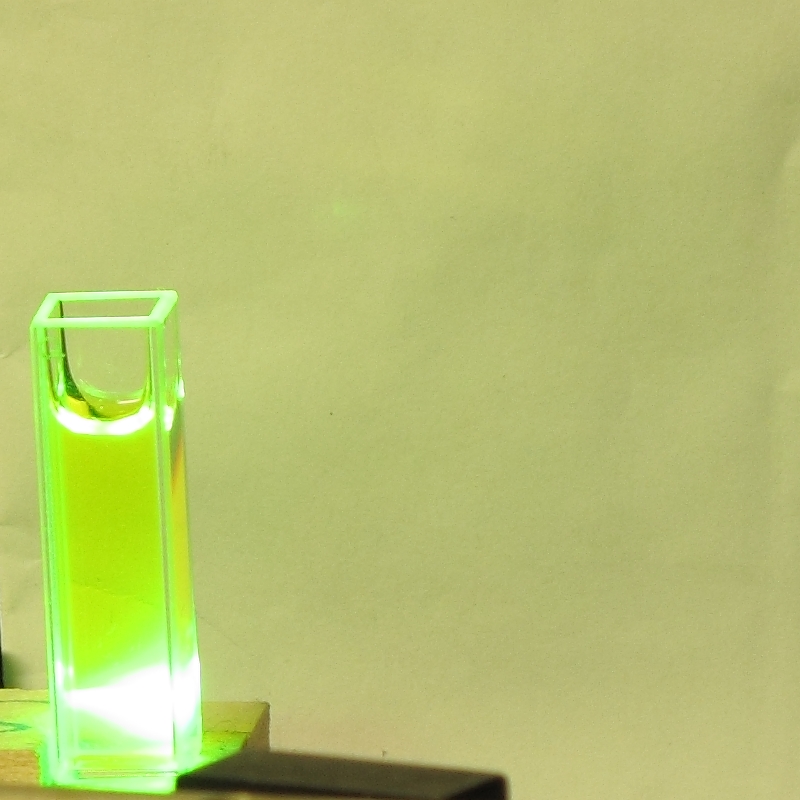
6 or 7 small drops of this ink in distilled water did
not lase. Notice how far the pump laser beam is
penetrating:
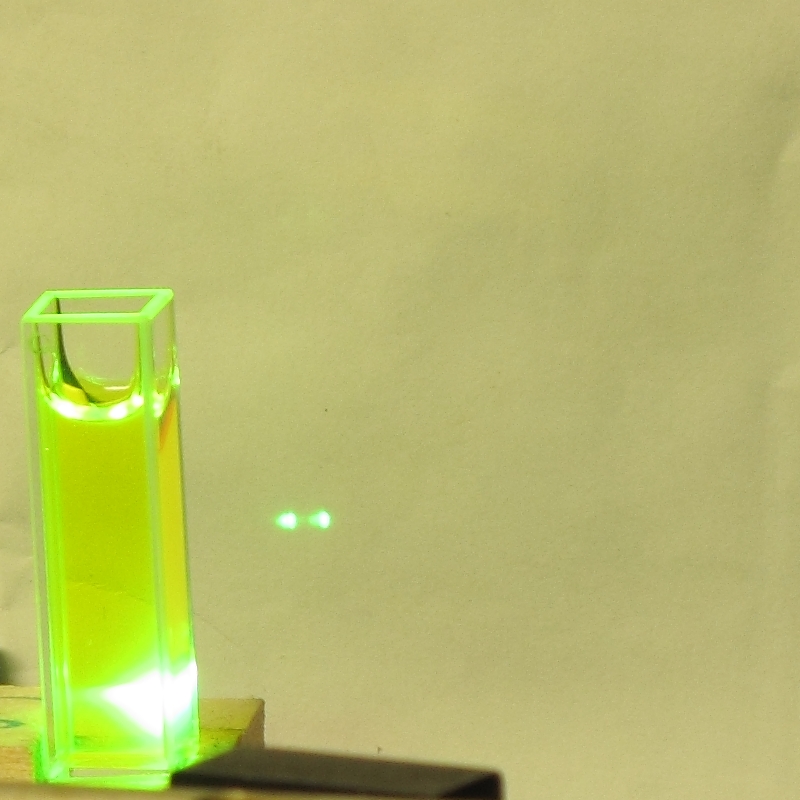
I doubled the concentration, and was pleased to discover
that it worked:
This issue is worth noting, as you are likely to
encounter it again if you deal with dye lasers. It
should come as no surprise that different dyes have
different absorption spectra; as it happens, neither
Firefly nor M205 Duo absorbs much at 337 nm. These
particular inks may be better suited to flashlamp
pumping, where the pump spectrum includes wavelengths
that the dyes in them absorb better, or perhaps to
longitudinal pumping,
which takes slightly lower concentration.
[NOTE, added 2018.0910: I have now tried diluting this ink into
99.85% isopropanol, and also into regular rubbing alcohol (70%
isopropanol). It becomes turbid.]
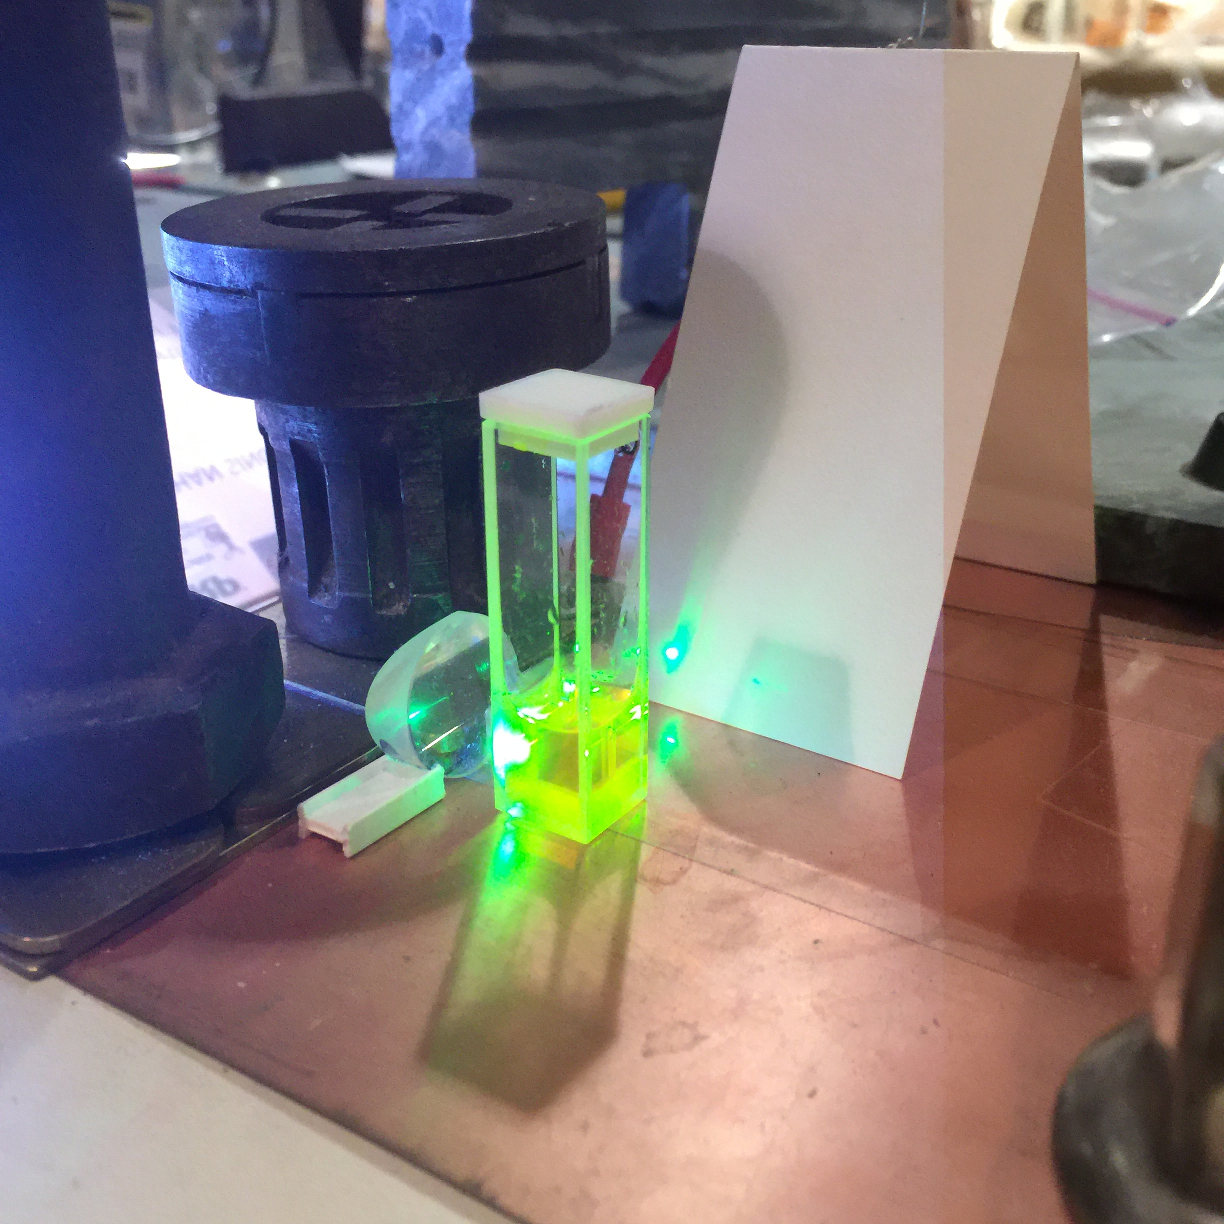
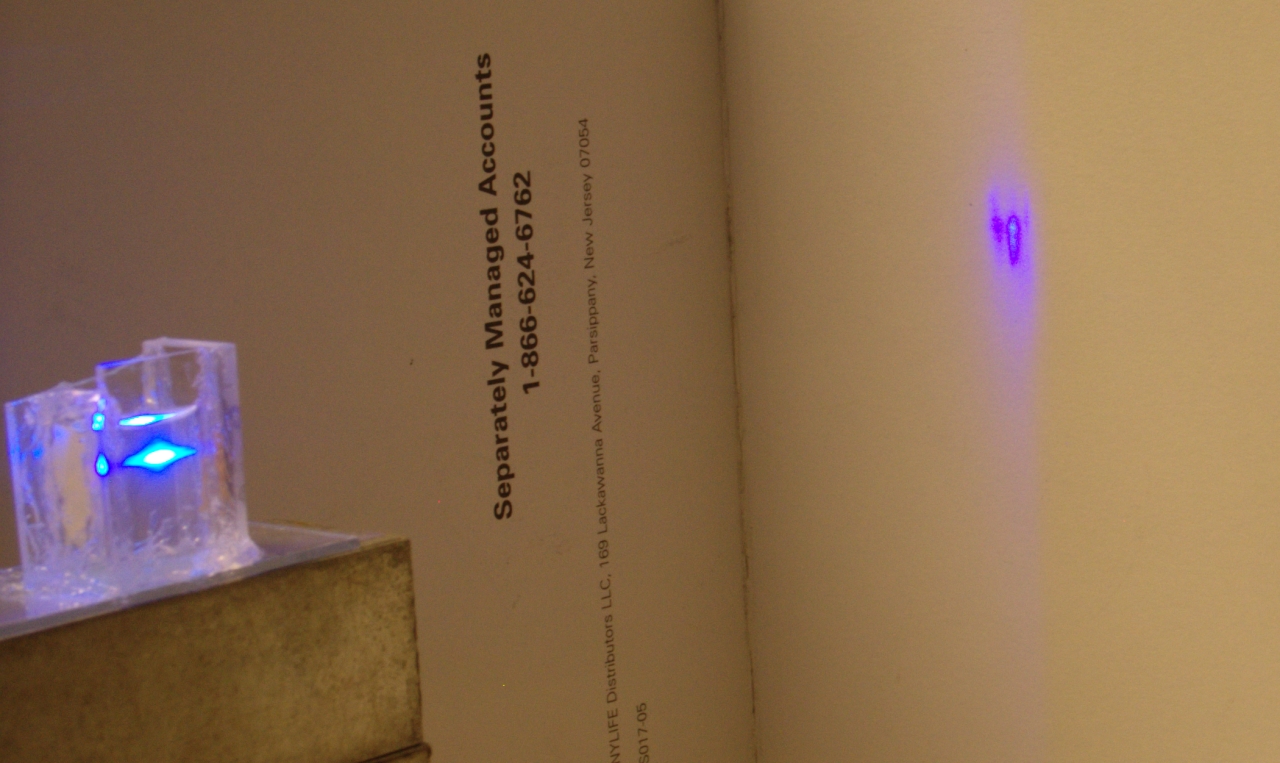
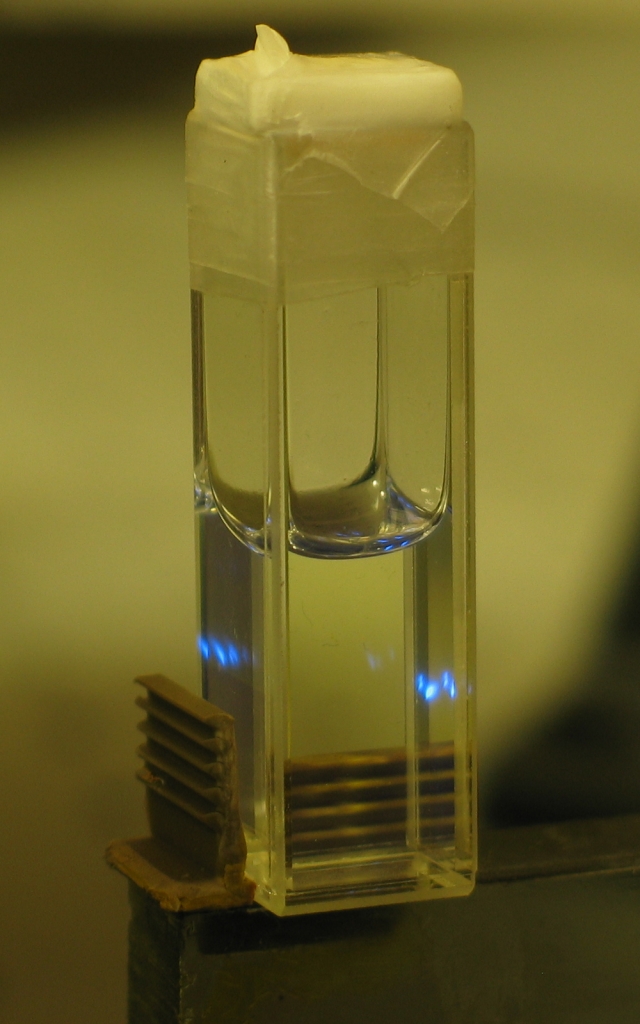
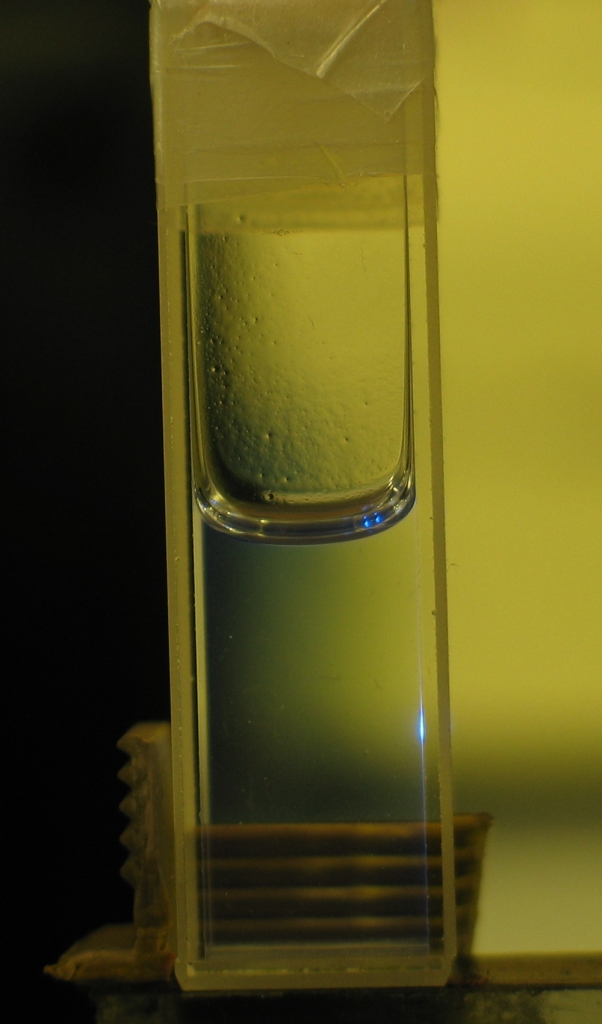
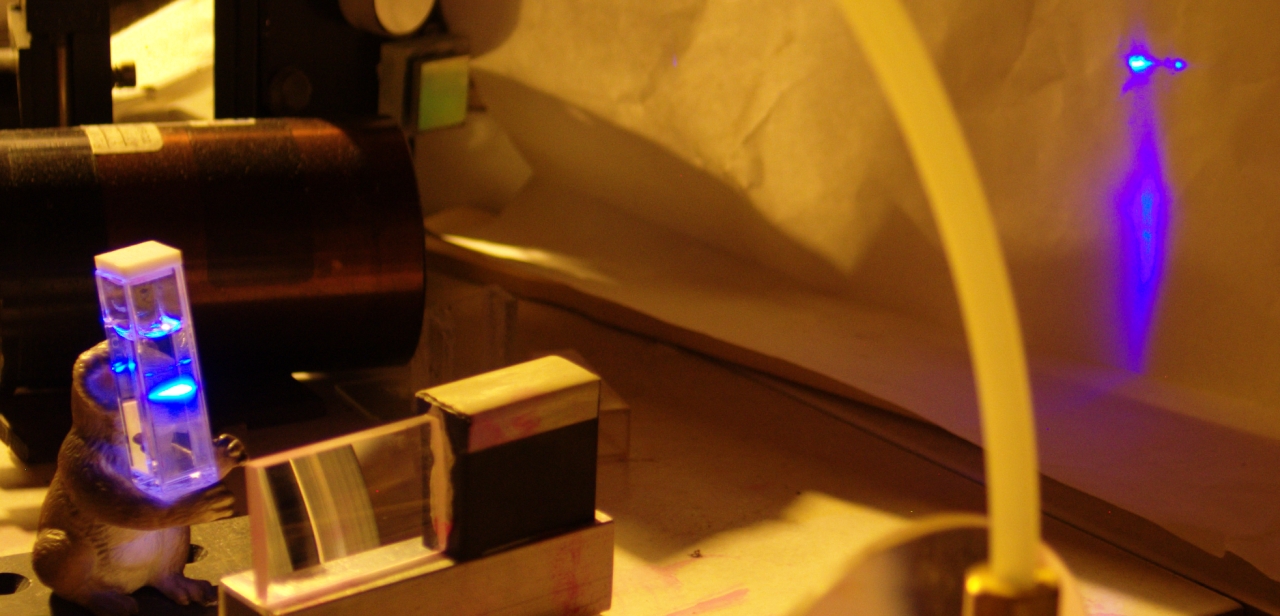
As mentioned above, Holger Jaenisch has lased
undiluted M205 highlighter ink. As of 2018.0910, so have I:
(In this case, the ink was pumped by an air laser; the end of
the channel is visible as a bluish or purplish glow to the left
of the cylindrical lens I used to focus the laser’s output
onto the cuvette.)
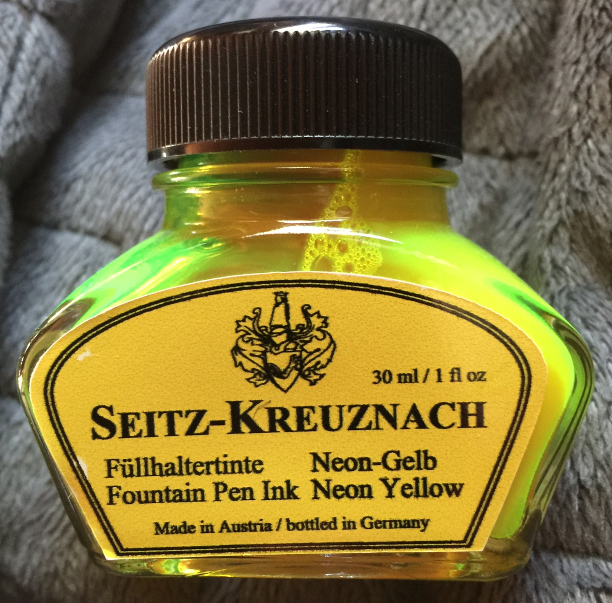
[Added 2018-1023]
I recently acquired a bottle of Seitz-Kreuznach neon-yellow highlighter ink.
This ink does not dilute well into isopropanol.
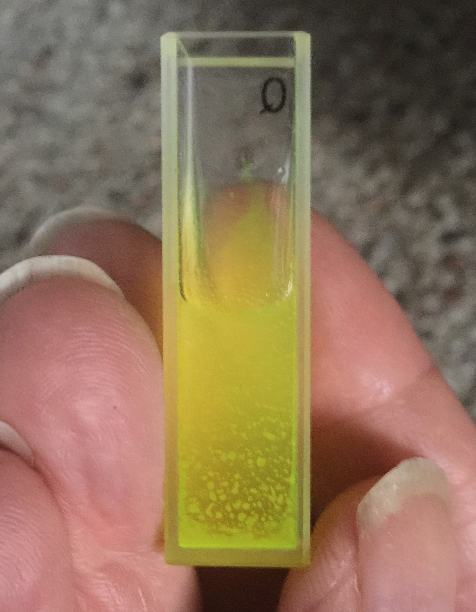
It dilutes reasonably well into water, but does not absorb
enough at 337nm to be suitable for nitrogen laser
pumping. Oddly, when I add acid to the solution, almost all of
the color disappears, and the fluorescence broadens and shifts
toward the blue. Despite the fact that it then absorbs better at
405 nm (violet laser pointer), it absorbs even less well at 337
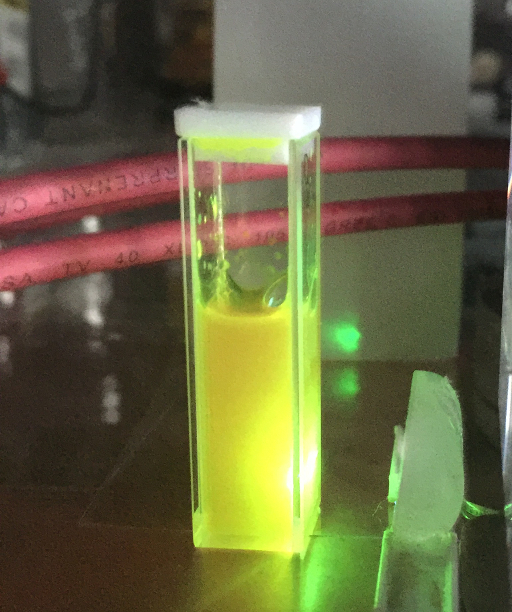
nm. (This photo provides good examples of two effects. First,
the shutter in the camera of my phone was not well synchronized
with the pulse from the air laser. Second, it is easy to see
the pump beam traveling much too far into the cuvette.)
I did succeed in lasing it straight out of the bottle.
(23 October, 2007)
In a discussion on the LASERS mailinglist a week or two
back, Jacob Thomas pointed out that Rit makes an
“Optical Whitener and Brightener” product,
which he has since lased. The Rit product appears to
consist of brightener, table salt, and some sort of
powder that does not dissolve in alcohol. You can
extract the brightener from this mixture with isopropyl
alcohol the same way you can extract powdered laundry
detergent, as discussed below; the difference is that it
is much more concentrated.
As soon as I saw Jake’s posting I went looking on
the Web for sources. It turns out that Rit products are
fairly easy to find. While performing that search,
however, I came across
Dharma Trading Company.
They carry a liquid product that they call
“Optic Whitener”, in 8-ounce bottles, and I
bought one. There seems to be some detergent in it, and
I found that when I added a small amount to some 99.8%
pure isopropanol I got a very turbid and almost opaque
result. This is not particularly surprising, as the
product is actually intended for use in water; I added
a bit of distilled water, and it cleared very nicely. (For
perhaps 2.5 ml of isopropanol, 7 or 8 drops of distilled
water seems to be enough to balance 2 small drops of
“DTC”, which is what I’ve been calling
this material. It is simpler, of course, to use 70% iso
from the drugstore, which is already dilute enough; I
mention the turbidity issue because it revealed
something about the dye.)
DTC is extremely concentrated, and you will only need a
tiny amount; for the following photo, I put two very
small drops into a cc or so of 95% ethanol. The solution
lases beautifully when I pump it with a low-pressure
nitrogen laser:
Note, added on 28 October, 2007: Jarrod Kinsey
found that he had no trouble with 91% isopropanol from
the drugstore. I typically get turbid [cloudy] solutions
when I add DTC to 91% isopropanol, and I’m not sure
why Jarrod’s experience was different from mine.
I have also verified that DTC dissolves just fine in 70%
isopropyl rubbing alcohol, and lases
very nicely.
(The cuvette in this photo contains two small drops of
DTC in about 2.5 ml of rubbing alcohol. The photo was
taken on 24 October, 2009, about two years after I wrote
the original note.)
Further Note, added on 27 December, 2008: If you
can acquire 95% ethanol (the brand I’m familiar with
is “Everclear”), it also works quite well.
As of 2008 I have not yet pumped this dye with a
flashlamp, so I don’t yet know what kind of
concentration is appropriate for that. I am, however,
confident that it will lase. [See next note.]
NOTE, added 05 January, 2010: This evening I
lased Optic Whitener in 70% isopropyl rubbing alcohol
from the drugstore, in a small dye laser that puts only
12 Joules into its flashlamp. That laser is covered on
Page 015a of this series,
where there is a photo of the blue output from this dye.
Note, added 16 November and 28 December, 2011:
Dharma Trading Company now lists this material as
“Uvitex BNB”. I have been unable to find
spectra for BNB, but Uvitex OB is listed as having
absorption max at 375 nm, fluorescence max at 437 nm,
and fluorescence quantum efficiency of 0.81 in DMF. If
we assume that BNB is not very different from OB, and
that the quantum efficiency is about the same in 70%
isopropanol as it is in DMF, this dye appears to be
slightly better than 7-Diethylamino-4-Methyl-Coumarin, a
classic blue laser dye.
Note, added 20 January, 2010: I begin to think
that the addition of a small amount of base (NaOH, KOH,
or concentrated ammonia) to the solution changes the
wavelength slightly and improves the performance; but
you can take that with a grain of salt, as I have only
done one trial so far.
Note, added 10 March, 2011: Since I wrote this
section I have found an article in which the authors
tested 25 optical brightener compounds, and were able to
lase the majority of them. Only two or three were really
good lasers, but that is not surprising: fluorescence is
not the only characteristic of a good laser dye. If I can
find the article again, I will provide a citation.
(2013.1028)
Holger Jaenisch ordered some of this dye from a vendor
on eBay, and was pleased to find that it lased nicely,
straight out of the bottle:
This example was pumped by his LN-1000 (see link, above),
and the pump beam was focused by an ordinary lens rather
than a cylindrical lens. Note the fact that the dye is
lasing mostly without feedback: you can tell by the tall
stripe; if there is much feedback, the output pattern is
a bright spot, or in some cases a bright spot superimposed
on the stripe. There is only a hint of a spot in this photo.
Maximal Ease of Use II:
“Optic Whitener”
Maximal Ease of Use III:
Refrigeration System Leak Test Dye